2018년 1월 28일 일요일

에어 풍선 기반 데이터 취득 키트 DIY 키트

다양한 실험용 키트를 우주에 보내는 영상이 뉴스 (#1#2)에 나온적이 있다. 이 글은 이를 위한 에어 풍선 기반 데이터 취득 키트 DIY 키트에 대한 레퍼런스를 소개한다.


1. Sent into Space
우주에 물건, 인공위성, 카메라를 보내는 프로젝트 사이트이다.

아래에 이와 관련된 키트를 판매하고 있다.


2. High Altitude Science
고고도 과학 데이터 취득 및 연구를 위한 사이트이다.

기상 관측용 풍선 키트를 판매하고 있다.


이 글은 에어 풍선 기반 카메라 데이터 취득을 위한 장치 개발 방법을 자세히 설명하고 있다. 
Send a camera to space (인스트럭터블)


오픈소스 기반 사운딩 로켓(Sounding Rocket)

이 글은 오픈소스 기반 사운딩 로켓에 대한 몇몇 괜찬은 레퍼런스를 정리한다.

1. 오픈소스 기반 로켓 시뮬레이션 개발 레퍼런스
헬싱키 대학에서 로켓 시뮬레이션 소프트웨어 개발을 위해 연구한 내용이다.
로켓 비행 단계
시뮬레이션 소프트웨어 구조(UML)
테스트 로켓과 로켓 시뮬레이션 결과

2. Rocketry 
아마추어 로켓 개발자 블로그이다. 많은 내용과 아이디어가 정리되어 있다. 
3. Hobby Space
취미로 로켓을 개발하는 사람들이 소프트웨어, 디자인 등 리소스를 구할 수 있는 곳이다. 
로켓 엔진
4. Arocketry
로켓 개발에 사용되는 소프트웨어, 지침 등을 모아둔 사이트이다. 
5. Sirius Rocketry
로켓 KIT 판매 사이트이다. 
6. Rocketarium
전문 로켓 KIT 판매 사이트이다. 
7. JonRocket
로켓 KIT 판매 사이트이다. 
주요 사운딩 로켓 제작과 관련된 레퍼런스들을 살펴보았다. 다만, 사운딩 로켓을 테스트하기 위한 장소가 별로 없는 국내에서는 관련 연구 개발이 제약적인게 아쉽다.


2018년 1월 11일 목요일

웹기반 수학 교육 오픈소스 도구 GeoGebra

지오지브라(GeoGebra)는 2002년 오스트리아 마르쿠스 호헨바터에 의해 개발된 오픈소스 기반 수학교육 도구이다. 지오지브라는 기하, 대수, 미적분, 통계 및 이산수학을 쉽게 다룰 수 있다. 아이패드, 안드로이드, 윈도우 8 앱에서 실행되며, HTML5로 포팅되어 웹을 지원한다(wikipedia).
Markus Hohenwarter 교수의 GeoGebra 소개


독일과 오스트리아 수학 교사들이 지오지브라 활용과 개선에 많은 노력을 하였으며, Austria Academy of Science와 오스트리아 케플러 대학 지원을 받아 많은 개발이 이루어졌다. 현재는 50명 이상의 다국적 개발자가 오픈소스를 지속적으로 관리, 개발하고 있다.
지오지브라의 이름은 지오(Geometry. 기하)와 지브라(Algebra. 대수)의 합성어로 동적 기하 소프트웨어(DGS. Dynamic Geometry Software)와 컴퓨터 대수 시스템(CAS. Computer Algebra System)을 결합한 소프트웨어라는 의미를 담고 있다. 따라서 지오지브라는 다양한 수학 영역의 대상을 다룰 수 있는 동적 수학 소프트웨어(DMS. Dynamic Mathematics Software)라고 볼 수 있다.
대화형 수학 교육 도구
3차원 그래픽 지원 도구

지오지브라는 수학교육을 지원하는 저작도구로, 학생들과 대화식으로 작동하는 워크시트를 만들 수 있다. 예를 들어, 지오지브라는 수학 식, 함수, 기하를 모델링할 수 있는 명령을 제공하기 때문에, 이 명령들을 기술해, 서로간의 구속조건을 정의할 수 있다.
Geometric Constructions with Commands

지오지브라를 사용하는 상세한 방법을 알고 싶다면, 아래 링크를 참고하자. 지오지브라는 이미 한국화 작업이 되어 있어, 학생들이 사용하기가 어렵지 않다. 
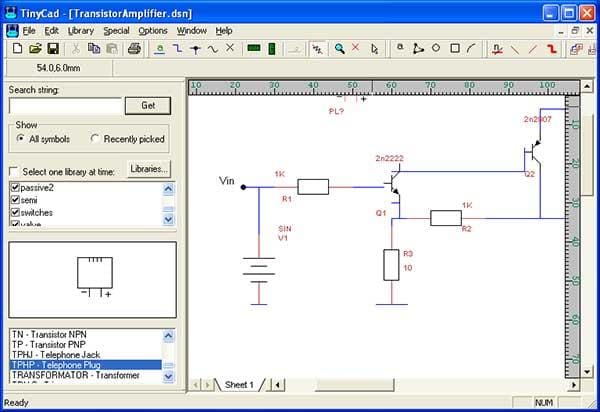
지오지브라는 인터넷 접속되는 컴퓨터만 있으면 무료로 사용할 수 있고, 사용법이 어렵지 않아, 학교에서도 활용가능하며, 집에서 홈스쿨링하는 부모들에게도 유용하다.

2018년 1월 2일 화요일

무료 3차원 모델 제공 웹사이트

이 글은 무료로 3차원 모델 형상 소스를 제공하는 웹사이트를 소개한다.

Free 2D People, vegetation, vehicles, and more…

  • Escalatina –Database for Latin-American architects to populate their renders with local figures
  • Nonscandinavia – Free Hi Res 2d Cutout people from around the world
  • Cut Out Life – Database of render people of various ethnicities
  • Cut Out People – Free cut out people, animals, transport, nature, and objects
  • Skalgubbrasil – Database for Latin-American architects to populate their renders with local figures.
  • Skal Gubbar -Library of free high-resolution cutout images of people
  • Mr. Cutout – Database of render people, vegetation, vehicles, objects and more.
  • CadTutor – Free collection of images, trees, people, skies and more.
  • Flyingarchitecture – V-Ray textures which include bump and displacement maps.
  • Designfreebies – Free high-resolution photos of skies, clouds, sunsets and much more.
  • Immediate Entourage – Such a great site to find a large collection of cutout people.
  • XOIO AIR – Large collection of office scenes, coffee scenes, people scene from above, people scene from below, etc.
  • Gobotree – A large and growing library of free images and cutouts created by the people at Vyonyx

Free 3D Models and Textures

  • Onecommunityglobal – a list of the most realistic plants optimized for SketchUp
  • Coalesse – free furniture models for non-commercial use.
  • cgtrader.com – Huge collection of excellent quality 3D models, free and paid for
  • Hdri-Skies.com – Good collection of free HDRI sky maps in 4K resolution
  • TonysTextures – 4000 free textures and several tutorials and other freebies for architectural visualization.
  • Swtexture – Free high-quality wood texture
  • Archive 3D – Large collection of free 3D models
  • 3Dup.com – Free Grasses and weed models in 3ds, very useful!
  • Bricks’n’Tiles – Design Photo-realistic textures for high-quality 3D content
  • CGDigest – Selection of models from furniture to transport and electronics
  • Turbosquid Free – Loads of good quality free models
  • CG Textures – The worlds largest free texture site
  • Archi-Vision Studio – Watercolor entourage images (skies, trees, bushes, people, and cars)
  • 3dmd.net – Free textures for 3D artists
  • 3Dmodelsharing – Free library once you register, various file types
  • Archweb – Free cad blocks and textures
  • HDRI-Hub – Small collection of free HDRI skies.
  • Gtrove – Small collection of free HDRI’s
  • NoEmotion HDR’s – Free collection of  day, evening and night HDRI’s
  • Krost Office Furniture – Free collection of SketchUp models
  • SketchUpTexture – Growing collection of free good quality models and textures
  • Knoll Office Furniture – Free SketchUp models…100’s of them
  • 3drender.co.uk – Some free samples and models
  • Textures Forrest – High resolution free textures
  • DesignBeep – Collection of high quality and free brick textures
  • High Resolution Textures – Free Textures, game textures, 3D textures, design resources
  • Texturemate – Free textures, brushes and patterns
  • carbodydesign.com – Free 3D car models various formats, some SketchUp models
  • BIMstop.com – Free models, but you need to register first
  • SteelSelect.com – Free SketchUp Component library for eaves guttering
  • Landscapeforms – SketchUp library of 3D models
  • Render Textures – Seamless diffuse, bump and displacement maps
  • OpenFootage – HDRI panorama’s and more
  • Graphic Mania – High quality old paper Photoshop textures
  • Grunge Textures – High quality textures, metal, brick, concrete, stone, asphalt, wood and more
  • Smartibl – Some HDRIs and other goodies
  • Naldzgraphics – Free high quality wood textures,200+
  • Designmoo – Free PSDs, vectors, textures, patterns, fonts, and more
  • LeMog – Free texture library (French)
  • CadYou – Free 3D models textures and Cad Blocks
  • Vyonyx – Cutout people, trees, textures and tutorials
  • Archiforge – Textures and CAD library
  • 3D Warehouse – Huge collection of free 3D SketchUp Models
  • Appiani – Free 3D library and textures

2017년 12월 31일 일요일

IIoT시스템 개발을 위한 오픈소스

이 글은 IIoT(Industrial Internet of Things, 산업용 사물인터넷) 개발을 위한 PCB 레이아웃 설계를 위한 오픈소스를 간략히 소개한 글입니다. 이 다음 글을 레퍼런스하였습니다.

TinyCAD 
TinyCAD는 다양한 라이브러리를 지원하는 PCB 레이아웃 및 회로도 설계 도구이다. TinyCAD는 심볼, 텍스트, 주석, 버스 및 전원 신호, 기호 속성에서 도면 편집에 이르는 다양한 기능을 제공한다.
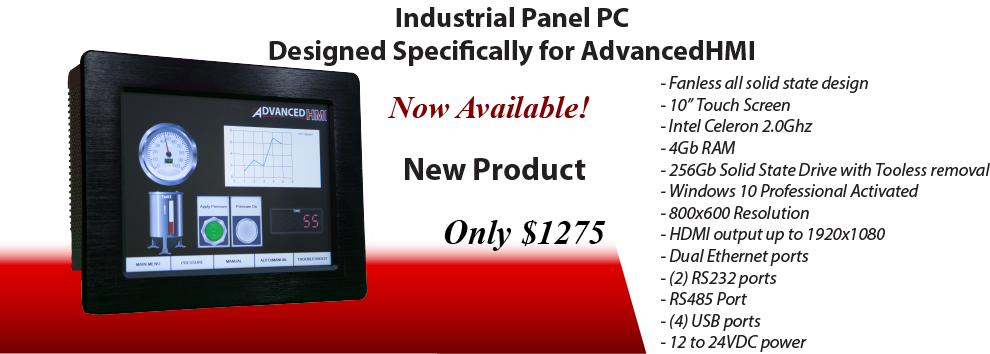
AdvancedHMI
이 프로그램을 이용하면 HMI(Human-Machine Interface)를 손쉽게 만들 수 있다. 이는 Visual Studio가 필요하며 .NET Framework를 기반으로 한다.
SCADA가 가능하며 Omron, Allen Bradley DF1 RS232 드라이버를 지원한다. Linux의 Mono에서 테스트되었으며, Raspberry Pi에서도 작동된다.
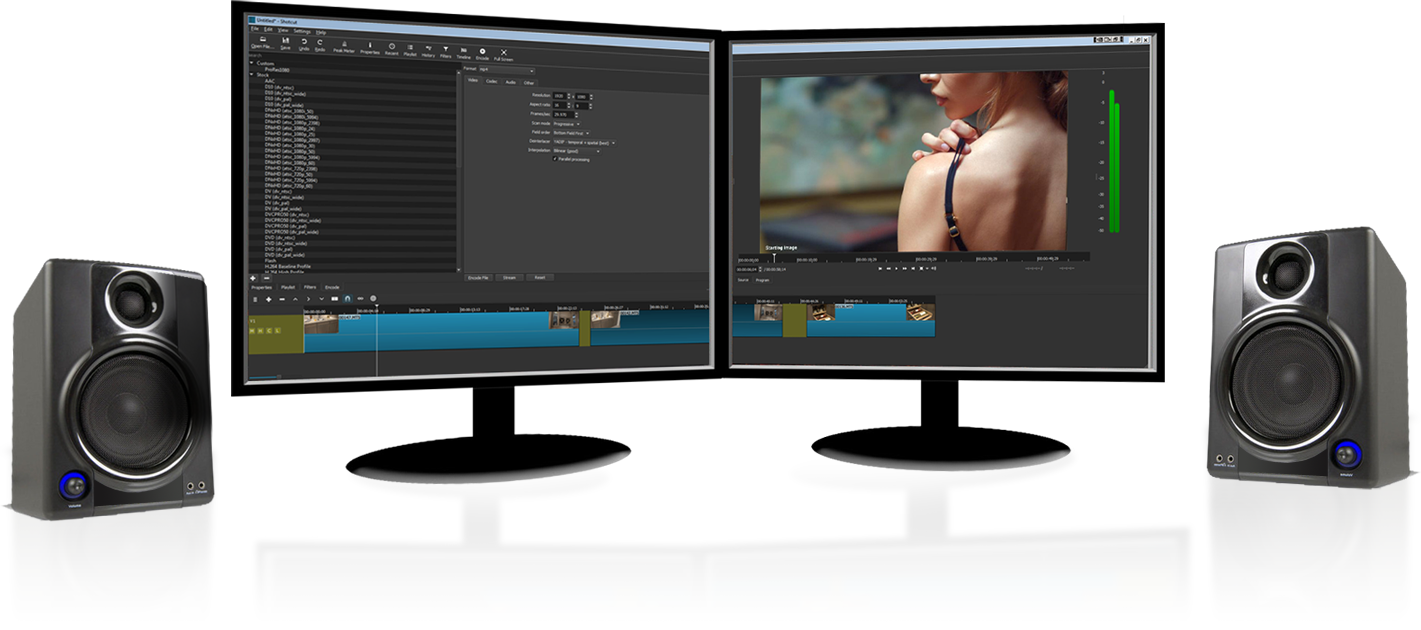
Shotcut
Shotcut 비디오 편집 소프트웨어는 다양한 종류의 비디오 및 오디오 형식을 지원한다. 동일한 프로젝트에서 기본 편집, 다중 형식 타임 라인, 해상도 및 프레임 속도를 지원한다. 이 프로그램은 화면, 웹캠, 오디오 캡처에도 사용된다. 최대 4k의 해상도를 지원하고 X11 화면과 Windows DirectShow를 캡처할 수 있다.

iDempiere
기업용 오픈 소스 ERP 소프트웨어이다. 고객 관계 관리 및 공급망 관리를 지원한다. iDempiere는 여러 조직, 다중 언어 지원, 다중 통화 및 다중 계정 스키마를 지원한다. 엔터티, 유효성 검사 규칙, 사용자 지정 응용 프로그램을 관리 할 수 있는 Java 기반 서버로 구성된다.

LibrePlan
프로젝트 관리를 위한 공동 협업 도구이다. 사용자는 작업 및 프로젝트를 계획, 모니터링, 제어, 구성을 할 수 있다.


2017년 12월 21일 목요일

사용자 인터페이스 개발을 위한 오픈소스 프론트엔드 프레임웍 Vue.js

vue는 javascript 기반 사용자 인터페이스 개발을 위한 오픈소스 프런트엔드 프레임웍이다.
이와 비슷한 프레임웍은 React, AngularJS, express와 함께 가장 많이 사용된다. 이 글은 관련 내용 및 사용법을 간단히 설명한다.

머리말
vue는 상대적으로 사용하기 쉽고 플러그인이 다양하며 설치가 쉽다. vue 웹 애플리케이션 프레임웍크를 제공해, 손쉽게 앱 사용자 인터페이스를 개발할 수 있다.


하이브리드 앱 개발을 위해 Cordova(코르도바)와 함께 사용하기도 한다.

Vue는 Evan You에 의해 개발되었으며, Angular의 장점을 도입하였다.

Vue.js는 템플릿 문법을 이용해 DOM에 데이터를 렌더링하기 쉽다.

<div id="app">
  <span v-bind:title="message">
    you can see the binding message.
  </span>
</div>

var app = new Vue({el: '#app', data: {message: 'Hello world! ' + new Data() + '...'}})

Vue는 이미 만들어놓은 컴포넌트를 재활용해, 응용 프로그램을 손쉽게 개발할 수 있다.

설치
node 링크를 방문해 설치한다. 설치 후 터미널이나 명령창에서 버전을 확인한다.
node -v
npm -v

다음과 같이 폴더를 생성한다.
mkdir vue-npm && cd vue-npm

npm을 초기화하고, vue를 설치한다. 패키지 설치가 안되면, 시스템 변수 PATH 에 node package 경로를 추가해 주어야 한다.
npm init -y
npm install vue --save

npm CLI(command line interface)를 설치한다.
npm install -g @vue/cli
npm install vue-cli -g

프로젝트 생성
이제 다음과 같이 프로젝트를 생성한다. 옵션은 default로 선택한다.
vue create vue-proj
vue project 설치 후 모습

프로젝트 생성 후, 다음 명령으로 생성된 프로젝트를 node서버로 실행한다.
npm run serve

yarn을 사용하면 'yarn serve'로 실행한다. 그리고, 실행된 서버 주소를 크롬에서 입력하면 다음 같은 웹페이지를 확인할 수 있다.
vue 설치 후 프로젝트 생성. 서버 실행 모습

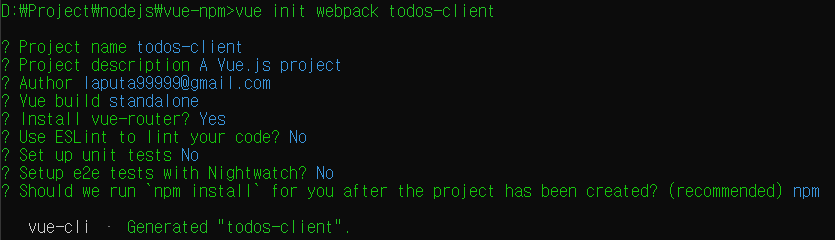
간단한 ToDo 프로젝트 개발
다음과 같이 todos-client 이름으로 프로젝트를 생성한다. webpack은 기본적인 vue 템플릿과 패키지가 포함된 패키지이다.

vue init webpack todos-client
옵션은 다음과 같다. 이름을 넣고 router 기능을 활성화한다.

이 결과로 다음 프로젝트 폴더와 파일이 생성된다. 

다음 명령을 통해 서버를 실행한다.
cd todo-client
npm install
npm run dev

크롬을 실행해 http://localhost:8080 을 접속하면, 다음 화면을 볼 수 있다.

이제, /index.html 을 열고, 다음 코드를 붙여 넣는다. 이를 통해, 다양한 그래프, 그리드, 디자인된 템플릿 등을 제공하는 boostrap을 사용할 수 있다.
<!DOCTYPE html>
<html>
  <head>
    <meta charset="utf-8">

    <meta name="viewport" content="width=device-width, user-scalable=no">
    <title>todo-client</title>
    <!-- Latest compiled and minified CSS -->
<link rel="stylesheet" href="https://maxcdn.bootstrapcdn.com/bootstrap/3.3.7/css/bootstrap.min.css" integrity="sha384-BVYiiSIFeK1dGmJRAkycuHAHRg32OmUcww7on3RYdg4Va+PmSTsz/K68vbdEjh4u" crossorigin="anonymous">

  </head>
  <body>
    <div class="container">
      <div id="app"></div>
    </div>
    <!-- built files will be auto injected -->
  </body>

  <!-- jQuery (necessary for Bootstrap's JavaScript plugins) -->
  <script src="https://ajax.googleapis.com/ajax/libs/jquery/1.12.4/jquery.min.js"></script>
  <!-- Latest compiled and minified JavaScript -->
<script src="https://maxcdn.bootstrapcdn.com/bootstrap/3.3.7/js/bootstrap.min.js" integrity="sha384-Tc5IQib027qvyjSMfHjOMaLkfuWVxZxUPnCJA7l2mCWNIpG9mGCD8wGNIcPD7Txa" crossorigin="anonymous"></script>
</html>

이제 src/App.vue를 열어본다. 말 그대로 vue 프로젝트의 어플리케이션 컴포넌트로 다음 3개 구조로 되어 있다.
template: HTML DOM (Document Object Model) 구조를 정의함(디자인)
script: 스크립트를 정의한다.
style: 디자인 스타일을 정의한다.

이 중에 template 에 다음과 같이 button을 추가한다.
<template>
  <div id="app">
    <img src="./assets/logo.png">
    <router-view/>
<button class="btn btn-primary">Button</button>
  </div>
</template>

그럼 다음과 같이 button이 동적으로 생성된다. 
이제 2개의 컴포넌트를 만들고, router를 이용해 각 컴포넌트가 특정 URL일 경우, 라우팅하여 동작하도록 해 보겠다. 

src/components에 Example.vue 컴포넌트를 다음과 같이 만든다.
<template>
  <div class="panel panel-default">
    <div class="panel-heading">Panel heading without title</div>
    <div class="panel-body">
      Panel content
    </div>
  </div>
</template>

<script>
export default {
  name: 'Example',
  data () {
    return {
      msg: 'Basic panel example'
    }
  }
}
</script>

src/components에 TodoPage.vue 컴포넌트를 다음과 같이 만든다.
<template>
  <div>
    
  </div>
</template>

<script>
  export default {
    data(){
      return {
        msg:'Example Vue'
      };
    },
    mounted() {
      console.log('Component mounted.')
    }
  }
</script>

src/router/index.js를 열고, 다음과 같이 파일을 수정한다.
import Vue from 'vue'
import Router from 'vue-router'
import HelloWorld from '@/components/HelloWorld'
import Example from '@/components/Example'
import TodoPage from '@/components/TodoPage'

Vue.use(Router)

export default new Router({
  routes: [
    {
      path: '/',
      name: 'Hello',
      component: HelloWorld
    },
    {
      path: '/example',
      name: 'Example',
      component: Example
    },
    {//추가
      path: '/todos',
      name: 'TodoPage',
      component: TodoPage
    }
  ]
});

이제, URL 주소창에 example, todos를 다음과 같이 입력해 본다. App.vue의 <router-view/> 디자인이 라우팅된 컴포넌트에 따라 동적으로 생성되는 것을 확인할 수 있다.

TodoPage.vue를 다음과 같이 수정한다. 이 결과로 TODO를 입력할 Text 박스와 Add 버튼, Add버튼 클릭시 추가되는 ToDo list-group이 생성된다.
<template>
<div class="container">
<h2>Todo List</h2>
<div class="input-group" style="margin-bottom:10px;">
<input type="text" class="form-control" placeholder="Input TODO">
<span class="input-group-btn">
<button class="btn btn-default" type="button">Add</button>
</span>
</div>
<ul class="list-group">
<li class="list-group-item">
Clean
<div class="btn-group pull-right" style="font-size: 12px; line-height: 1;">
<button type="button" class="btn-link dropdown-toggle" data-toggle="dropdown" aria-haspopup="true" aria-expanded="false">
See more<span class="caret"></span>
</button>
<ul class="dropdown-menu">
<li><a href="#">Delete</a></li>
</ul>
</div>
</li>
</ul>
</div>
</template>

App.vue의 style 부분은 불필요하므로 삭제한다.

이제 Input TODO text 에 입력된 값을 Todo list에 추가하는 스크립트 코드를 다음과 같이 TodoPage.vue에 코딩한다.
<template>
<div class="container">
<h2>Todo List</h2>
<div class="input-group" style="margin-bottom:10px;">
<input type="text" class="form-control" placeholder="Input TODO">
<span class="input-group-btn">
<button class="btn btn-default" type="button">Add</button>
</span>
</div>
<ul class="list-group">
<li class="list-group-item" v-for="(todo, index) in todos">
{{todo.name}}
<div class="btn-group pull-right" style="font-size: 12px; line-height: 1;">
<button type="button" class="btn-link dropdown-toggle" data-toggle="dropdown" 
aria-haspopup="true" aria-expanded="false">
More <span class="caret"></span>
</button>
<ul class="dropdown-menu">
<li><a href="#">Delete</a></li>
</ul>
</div>
</li>
</ul>
</div>
</template>

<script>
export default {
  name: 'TodoPage',
  data () {
    return {
      todos: [
        {
          name:'Clean'
        },
        {
          name:'Writing'
        },
        {
          name:'Eat'
        },
        {
          name:'Make'
        }
      ]
    }
  }
}
</script>

다음과 같이 ToDo 추가/삭제 기능을 만들어 본다.
<template>
<div class="container">
<h2>Todo List</h2>
<div class="input-group" style="margin-bottom:10px;">
<input type="text" class="form-control" placeholder="Input TODO" v-model="name" v-on:keyup.enter="createTodo(name)">
<span class="input-group-btn">
<button class="btn btn-default" type="button" @click="createTodo(name)">Add</button>
</span>
</div>
<ul class="list-group">
<li class="list-group-item" v-for="(todo, index) in todos">
{{todo.name}}
<div class="btn-group pull-right" style="font-size: 12px; line-height: 1;">
<button type="button" class="btn-link dropdown-toggle" data-toggle="dropdown" 
aria-haspopup="true" aria-expanded="false">
More <span class="caret"></span>
</button>
<ul class="dropdown-menu">
<li><a href="#" @click="deleteTodo(index)">Delete</a></li>
</ul>
</div>
</li>
</ul>
</div>
</template>

<script>
export default {
  name: 'TodoPage',
  data () {
    return {
      todos: [
        {
          name:'Clean'
        },
        {
          name:'Writing'
        },
        {
          name:'Eat'
        },
        {
          name:'Make'
        }
      ]
    }
  },
methods: {
deleteTodo(i) {
this.todos.splice(i, 1);
}, 
createTodo(name) {
this.todos.push({name:name});
this.name = null;
}
}
}
</script>

이제 제대로 동작하는 ToDo 어플리케이션을 완성했다.

다른 개발자가 만든 Todo 앱도 많다. 이 링크를 참고한다.

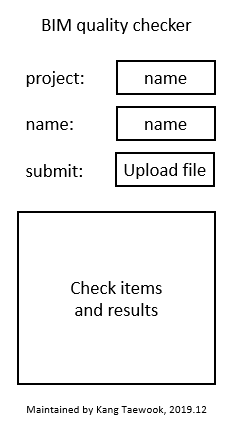
웹 기반 BIM checker 프로그램 개발
웹기반 BIM 품질검토 프로그램을 개발해 보겠다. 이 프로젝트는 2개의 텍스트 입력, BIM(Building Information Modeling) IFC(Industry Foundation Classes) 파일을 업로드받고, 파일을 파싱한 후, 기본적인 속성 품질 체크 결과를 출력하는 프로그램이다. 다음과 같은 폼을 가진다.
vue 사용방법을 익히는 것이 목적이므로, 파일 파싱 등 상세한 내용은 여기서 다루지 않는다. 다음 같이 프로젝트를 생성한다.
vue create bim-checker
npm run serve

부록: REST API 활용 데이터 추가/삭제/리스트
앞의 ToDo 어플리케이션에서 REST API를 사용해 보겠다. API는 List, CRUD(create, read, update, delete) 연산을 지원하다. 이를 위해 axios 라이브러리를 이용한다. axios는 비동기 HTTP 를 지원한다. 다음과 같이 설치한다.
npm install axios --save-dev

src/main.js 에 다음과 같이 axios를 import한다. 이를 통해 axios를 전역적으로 사용할 수 있다.
import axios from 'axios'

Vue.prototype.$http = axios
Vue.config.productionTip = false

이제 TodoPage.vue 컴포넌트를 다음과 같이 CRUD REST API 지원하는 서버를 통해, Todo 데이터를 추가, 삭제, 리스트하도록 기존 코드를 변경해 본다. 
<template>
<div class="container">
<h2>Todo List</h2>
<div class="input-group" style="margin-bottom:10px;">
<input type="text" class="form-control" placeholder="Input TODO" v-model="name" v-on:keyup.enter="createTodo(name)">
<span class="input-group-btn">
<button class="btn btn-default" type="button" @click="createTodo(name)">Add</button>
</span>
</div>
<ul class="list-group">
<li class="list-group-item" v-for="(todo, index) in todos">
{{todo.name}}
<div class="btn-group pull-right" style="font-size: 12px; line-height: 1;">
<button type="button" class="btn-link dropdown-toggle" data-toggle="dropdown" 
aria-haspopup="true" aria-expanded="false">
More <span class="caret"></span>
</button>
<ul class="dropdown-menu">
<li><a href="#" @click="deleteTodo(todo)">Delete</a></li>
</ul>
</div>
</li>
</ul>
</div>
</template>

<script>
export default {
  name: 'TodoPage',
  data () {
    /* return {
      todos: [{name:'Clean'}, {name:'Writing'}, {name:'Eat'}, {name:'Make'}]
    */
return {
name: null,
todos: []
}
  },
methods: {
deleteTodo(todo) {
// this.todos.splice(i, 1);
var vm = this
this.todos.forEach(function(_todo, i, obj){
if(_todo.id === todo.id){
vm.$http.delete('http://vue.todo.data/api/todos/'+todo.id)
.then((result) => {
obj.splice(i, 1)
})
}
})
}, 
createTodo(name) {
if(name != null){
var vm = this;
this.$http.defaults.headers.post['Content-Type'] = 'application/json';
this.$http.post('http://vue.todo.data/api/todos',{
name:name
}).then((result) => {
vm.todos.push(result.data);
})
this.name = null;
}
}, 
getTodos(){
this.$http.get('http://vue.todo.data/api/todos')
.then((result) => {
console.log(result)
})
}
},
mounted() {
this.getTodos();
}
}
</script>

앞의 코드에서 vue.todo.data에 해당하는 주소는 실제 API를 지원하는 주소로 변경해 본다.

레퍼런스
부록: React 
Vue와 유사하게 React는 인터렉티브 인터페이스를 웹에서 제공해주는 라이브러리이다. 2011년 페이스북에서 개발되었다. 리액트는 복잡한 웹 인터페이스를 개발할 수 있도록 해준다.
다음은 간단한 리액트 코드 예시이다(in vscode).

import React from 'react';
import ReactDOM from 'react-dom';
import './index.css';
import App from './App';
import reportWebVitals from './reportWebVitals';

var element = React.createElement('h1', { className: 'greeting' }, 'Hello, world!');
ReactDOM.render(element, document.getElementById('root'));

reportWebVitals();

리액트를 이용해 멀티플렛폼 동작 가능한 인터페이스를 개발할 수 있다.

2017년 12월 19일 화요일

Node기반 RESTful API 개발

서버 개발 시 API(Application Program Interface)를 지원해야하는 경우가 종종 생긴다. 이 경우, 많은 대안이 있을 수 있으나, 가볍고, 빠른 개발을 고려한다면, Node기반 RESTful API를 활용할 수 있다.
RESTful API 설명

Node기반 RESTful API 개발을 위해 주로 사용하는 패키지는 익스프레스이다. Node 패키지이므로 아래 명령어로 설치할 수 있다.

npm install express --save

Node와 Mongo DB를 이용하면, 데이터 RESTful 서버를 만드는 것은 그리 어렵지 않다.

좀 더 자세한 개발 방법(Node + Express + Mongo DB)은 아래 튜토리얼을 참고한다.

레퍼런스