2020년 7월 18일 토요일

우분투 업데이트, 용량 늘리기 및 각종 에러 해결 방법

우분투 사용 중에 갑자기 업데이트나 패키지 설치가 안되는 경우가 있다. 이 경우 sudo apt-get update 명령 입력 시 아래와 같은 에러 메시지들이 출력된다. 참고로, 본인의 경우, 엔비디아 보드 임베디드 패키지 설치를 위한 호스트 컴퓨터 사용중 시스템이 꼬였었다. 
E: Unable to locate package –f
e sub-process returned an error code


해결 방법을 정리한다. 

apt 시스템 오류 수정
다음과 같이 오류 수정 명령을 입력한다.
sudo dpkg --configure -a
sudo apt install -f
sudo apt --fix-broken install
sudo apt-get update

Sources.list 수정
다음과 같이 해당 파일을 수정한다.
sudo vi /etc/apt/sources.list

파일 내용은 이 링크를 참고해 다음과 같이 복사해 붙여 저장한다.
#deb cdrom:[Ubuntu 16.04.2 LTS _Xenial Xerus_ - Release amd64 (20170215.2)]/ xenial main restricted

# See http://help.ubuntu.com/community/UpgradeNotes for how to upgrade to
# newer versions of the distribution.
deb http://us.archive.ubuntu.com/ubuntu/ xenial main restricted
# deb-src http://us.archive.ubuntu.com/ubuntu/ xenial main restricted

## Major bug fix updates produced after the final release of the
## distribution.
deb http://us.archive.ubuntu.com/ubuntu/ xenial-updates main restricted
# deb-src http://us.archive.ubuntu.com/ubuntu/ xenial-updates main restricted

## N.B. software from this repository is ENTIRELY UNSUPPORTED by the Ubuntu
## team. Also, please note that software in universe WILL NOT receive any
## review or updates from the Ubuntu security team.
deb http://us.archive.ubuntu.com/ubuntu/ xenial universe
# deb-src http://us.archive.ubuntu.com/ubuntu/ xenial universe
deb http://us.archive.ubuntu.com/ubuntu/ xenial-updates universe
# deb-src http://us.archive.ubuntu.com/ubuntu/ xenial-updates universe

## N.B. software from this repository is ENTIRELY UNSUPPORTED by the Ubuntu
## team, and may not be under a free licence. Please satisfy yourself as to
## your rights to use the software. Also, please note that software in
## multiverse WILL NOT receive any review or updates from the Ubuntu
## security team.
deb http://us.archive.ubuntu.com/ubuntu/ xenial multiverse
# deb-src http://us.archive.ubuntu.com/ubuntu/ xenial multiverse
deb http://us.archive.ubuntu.com/ubuntu/ xenial-updates multiverse
# deb-src http://us.archive.ubuntu.com/ubuntu/ xenial-updates multiverse

## N.B. software from this repository may not have been tested as
## extensively as that contained in the main release, although it includes
## newer versions of some applications which may provide useful features.
## Also, please note that software in backports WILL NOT receive any review
## or updates from the Ubuntu security team.
deb http://us.archive.ubuntu.com/ubuntu/ xenial-backports main restricted universe multiverse
# deb-src http://us.archive.ubuntu.com/ubuntu/ xenial-backports main restricted universe multiverse

## Uncomment the following two lines to add software from Canonical's
## 'partner' repository.
## This software is not part of Ubuntu, but is offered by Canonical and the
## respective vendors as a service to Ubuntu users.
# deb http://archive.canonical.com/ubuntu xenial partner
# deb-src http://archive.canonical.com/ubuntu xenial partner

deb http://security.ubuntu.com/ubuntu xenial-security main restricted
# deb-src http://security.ubuntu.com/ubuntu xenial-security main restricted
deb http://security.ubuntu.com/ubuntu xenial-security universe
# deb-src http://security.ubuntu.com/ubuntu xenial-security universe
deb http://security.ubuntu.com/ubuntu xenial-security multiverse
# deb-src http://security.ubuntu.com/ubuntu xenial-security multiverse

소프트웨어 업데이트 설정 수정 및 에러 처리
다음과 같이 소프트웨어 업데이트 앱(Software Updates application)에서 설정을 수정한다.
1. "Other Software" tab 선택
all options 해제
2. Ubuntu Software tab 선택
"Download from:" 선택 후 "Main server" option 선택
3. "Close" 

다음 명령을 입력한다.
sudo sed -i -e 's|disco|eoan|g' /etc/apt/sources.list
sudo apt update

특정 패키지 업데이트 시 에러가 나면, 아래와 같이 업데이트 탭에서 해당 패키지 항목들을 삭제한다.

var/lib/dpkg/lock 에러 수정 방법
에러 수정 방법은 다음과 같다. 
sudo rm /var/lib/apt/lists/lock 
sudo rm /var/cache/apt/archives/lock 
sudo rm /var/lib/dpkg/lock*
sudo rm -rf /var/lib/dpkg/lock-frontend

sudo dpkg --configure -a 
sudo apt update

우분투 용량 확인 및 정리하는 방법
아래 명령으로 불필요한 파일들을 확인한 후 삭제한다.
df -h
sudo du -sh *

특히 루트의 snap, tmp, var를 확인하고 불필요한 부분은 삭제한다.
sudo rm -rf /var/cache/snapd/
sudo apt autoremove --purge snapd gnome-software-plugin-snap
rm -fr ~/snap

다음과 같이 현재 우분투 커널 버전을 확인하고, 사용안되는 오래된 커널들을 삭제한다.
uname -r
apt-get purge linux-image-버전

sudo apt-get clean
sudo apt-get autoclean
sudo apt-get autoremove

참고: 한글 설정 방법
한글이 갑자기 안될 때는 이 링크를 참고한다.

도커 기반 NVIDIA GPU 드라이버 설치 및 딥러닝 프레임웍 실행

이 글은 도커 기반 NVIDIA GPU 드라이버 설치 및 딥러닝 프레임웍 실행 방법을 설명한다.

머리말
딥러닝 모델 응용 프로그램을 개발하다보면, 다양한 버전과 환경으로 인해 의존성이 꼬여 에러가 나거나 문제가 생기는 경우가 발생한다. 하나의 설치가 다른 패키지에 영향을 주기 때문에, 아나콘다의 가상환경을 만들어 사용하기도 하나, 이 또한 전체 개발 환경에 영향을 미치므로 깨끗하게 해결할 수 있는 방법이 아니다.

이 경우, 엔비디아 GPU 드라이버를 도커 이미지로 설치하고, 이 엔비디아 도커 드라이버 위에서 텐서플로우, 케라스, 파이토치 같은 딥러닝 플랫폼이 담긴 도커를 실행하면 완전히 독립적인 환경에서 딥러닝 모델을 개발할 수 있다.
이 글 내용을 따라하기 위해서는 다음 개발환경이 설치되어 있어야 한다.
  • 우분투 16.04
  • NVIDIA GTX 1070 DRIVER
  • CUDA 9.0
  • DOCKER
도커 이미지 개발 방법에 대한 내용은 아래 링크를 참고한다.
도커 루트 폴더 변경
엔비디아 도커 설치 전에 도커 루트 폴더를 변경해야 한다. 그렇지 않으면, 우분투 루트 용량이 가득차 우분투가 다운될 수 있다. 다음 명령으로 관련 파일을 수정한다.
sudo gedit /lib/systemd/system/docker.service

파일 중에 아래 위치에 data-root 를 사용자 폴더(ex. /home/ktw/data/docker)로 설정한다.
ExecStart=/usr/bin/dockerd -H fd:// --containerd=/run/containerd/containerd.sock --data-root=/home/ktw/data/docker

도커 서비스를 재시작한다.
sudo service docker stop
sudo service docker start

도커의 데이터 루트 정보를 재확인해 본다.
docker info | grep Root
Docker Root Dir: /home/ktw/data/docker

엔비디아 도커 이미지 설치
만약, 기존 엔비디아 1.0 도커 버전이 있다면 삭제한다.
sudo docker volume ls -q -f driver=nvidia-docker | xargs -r -I{} -n1 docker ps -q -a -f volume={} | xargs -r docker rm -f
sudo apt-get purge -y nvidia-docker

엔비디아 2.0 도커 버전을 설치한다.
curl -s -L https://nvidia.github.io/nvidia-docker/gpgkey | sudo apt-key add -
distribution=$(. /etc/os-release;echo $ID$VERSION_ID)
curl -s -L https://nvidia.github.io/nvidia-docker/$distribution/nvidia-docker.list | sudo tee /etc/apt/sources.list.d/nvidia-docker.list
sudo apt-get install -y nvidia-docker2
sudo pkill -SIGHUP dockerd

설치 후 엔비디아 도커의 nvidia-smi 명령을 다음과 같이 실행한다.
sudo docker run --runtime=nvidia --rm nvidia/cuda:9.0-base nvidia-smi

다음과 같이 nvidia-docker 명령으로 이미지를 실행할 수도 있다.
sudo nvidia-docker run nvidia/cuda:9.0-base-ubuntu16.04 nvidia-smi

다음 화면이 보이면 성공한 것이다.

만약, 도커 실행 시 디폴트로 엔비디아 도커를 설정하려면 다음과 같이 파일을 수정한다.
sudo gedit /etc/docker/daemon.json

"default-runtime": "nvidia",
"runtimes":
{
   "nvidia":
   {
      "path": "nvidia-container-runtime",
      "runtimeArgs": []
   }
}
                               
텐서플로우 도커 이미지 설치 및 실행
쿠다 9.0에 맞는 텐서플로우 도커 이미지를 설치한다.
sudo docker pull tensorflow/tensorflow:1.8.0-gpu-py3      
sudo docker images   

다음과 같이 텐서플로우 도커를 실행하고, 쥬피터 노트북 서버를 구동한다. 참고로, 8888은 쥬피터 노트북 연결 포트, 6006은 텐서보드 연결 포트이다.
sudo nvidia-docker run -it -p 8891:8888 -p 6006:6006 --name ktw -v /home/ktw/Documents/docker:/notebooks -e PASSWORD="0000" --restart always tensorflow/tensorflow:1.8.0-gpu-py3

쥬피터 노트북을 크롬 등으로 http://localhost:8891 실행해 다음과 같은 화면이 보이면 성공한 것이다.

이제 딥러닝 모델 테스트를 도커 기반으로 진행할 수 있다.

도커의 볼륨 옵션을 사용하면, 도커 실행이 멈추어도, 볼륨과 맵핑된 폴더에 파일을 읽고 저장할 수 있다. 이를 이용해 데이터나 설정만 사용자별로 다르고, 도커 이미지를 여러개 실행하거나 다양한 딥러닝 모델 도커 이미지를 독립적으로 운용할 수 있을 것이다.

다음과 같이 볼륨에 맵핑된 호스트 폴더에 파이썬 파일을 저장하고, 쥬피터 노트북를 실행해보자. 해당 파일이 도커 이미지에서 서비스되고 있는 쥬피터 노트북에 보일 것이다.

import sys
import numpy as np
import tensorflow as tf
from datetime import datetime

device_name = 'gpu'  # Choose device from cmd line. Options: gpu or cpu
shape = (3, 3)
if device_name == "gpu":
    device_name = "/gpu:0"
else:
    device_name = "/cpu:0"
   
with tf.device(device_name):
    random_matrix = tf.random_uniform(shape=shape, minval=0, maxval=1)
    dot_operation = tf.matmul(random_matrix, tf.transpose(random_matrix))
    sum_operation = tf.reduce_sum(dot_operation)
    startTime = datetime.now()

with tf.Session(config=tf.ConfigProto(log_device_placement=True)) as session:
        result = session.run(sum_operation)
        print(result)# It can be hard to see the results on the terminal with lots of output -- add some newlines to improve readability.

print("\n" * 5)
print("Shape:", shape, "Device:", device_name)
print("Time taken:", str(datetime.now() - startTime))


실행 결과는 다음과 같다.

참고 - 도커 이미지 완전 삭제 명령
아래와 같이 -q 옵션을 주어, 도커 프로세스를 멈춘다음, 모든 도커 이미지 번호를 얻어 이미지를 삭제한다.  
sudo docker stop $(sudo docker ps -a -q)
sudo docker rm $(sudo docker ps -a -q)
sudo docker rmi $(sudo docker images -q)

레퍼런스
아래는 아마존 웹 서비스 머신러닝 클라우드 플랫폼 구조에 대한 내용을 링크한 것이다.

2020년 7월 11일 토요일

오픈소스 도구로 유전자 가위 만들기

이 글은 오픈소스 도구로 유전자 가위 만드는 방법을 공유한다. 이 글은 유전자 가위 해커로 유명한 Josiah에 대한 글을 참고하였다.

현재 유전자 가위 기술은 점차 대중화되어, 초파리 눈 색상을 바꾸는 유전자 공학 정도는 다음과 같은 도구가 있으면 일반인도 가능한 수준으로 발전되었다.

이 도구는 ODIN사에서 구매할 수 있다. 다음은 ODIN 창업자 관련 영상이다.

유전자 데이터 분석 기술도 오픈소스화되어 누구나 사용할 수 있다. 다음은 이와 관련된 링크이다.

데이터 분류에 편리한 머신러닝 기술 SVM(Support Vector Machine) 개념 및 사용하기

이 글은 머신러닝 기법 중 데이터 분류에 편리한 SVM(Support Vector Machine) 개념, 계산 및 사용 방법을 간략히 정리한다. SVM은 데이터 분류에 굳이 번거로운 딥러닝을 사용하고 싶지 않을 때, 간단히 여러 개발도구에 있는 SVM 함수를 호출해 분류 기능을 구현하고 싶을 때 사용한다.

SVM개념
SVM은 데이터를 구분할 수 있는 경계를 계산하는 알고리즘이다. 이 경계는 수학적 모델로 정의할 수 있으며, 회귀모델을 개발할 때와 비슷한 수치해석 방법을 사용한다. 경계 모델은 직선, 평면, 곡면 등이 될 수 있다. 이 경계는 다음 그림과 같이 두 데이터 군과의 거리차이가 가장 크게 차이가 나는(margin이 많은) 분류 기준이 된다.
경계 예시

SVM은 Boser, Guyon, Vapnic가 1992년 제안한 일종의 지도학습으로, 예를 들어, 두개의 데이터 그룹이 섞여 있을 경우, 이를 구분할 수 있는 경계를 찾는 알고리즘이다. 현재에도 많은 학계와 업계 사용하고 있다.

SVM 계산 기본원리
SVM 분류기는 Machine Learning에 포함된 간단한 이진 분류기이다. 이 장에서는 SVM이해를 위해 그라디언트 하강 최적화 접근 방식을 사용해, 데이터를 두 클래스로 분리하고 두 클래스 간 거리를 최대화 할 수 있는 선형 탐색 알고리즘을 설명한다. 이 장은 SVM Simple Example(medium, russsun, 2019.4)를 참고하였음을 밝힌다.

직선 공식은 다음과 같다.
w * x + b = 0
라벨 1의 경우는 w * x + b ≥ 1
라벨 -1의 경우는 w * x + b ≤ -1
두 클래스 사이의 간격 거리 다음과 같다.
2 / | w |
이 거리를 최대화한다.

두 클래스를 완벽하게 분리하는 라인을 탐색하는 SVM 비용 함수를 마진 비용 함수라고 한다. 예를 들어, 비용 함수를 사용할 때 Hinge loss함수를 사용할 수 있다.
max(0, 1 - yi (dot(w, xi) - b))
이를 구현한 알고리즘 소스코드는 다음과 같다. 참고로, main()함수에 구현된 것은 나이, 소득에 따라 집 구매 여부를 구분하는 SVM 모델 생성의 예이다.
double getHingeLoss(double &x1, double &x2, int &y, double &w1, double &w2, double &b)
{
  double loss = 0;
  if(y==1)
    loss = 1-(w1*x1 + w2*x2 + b);
  else
    loss = 1+(w1*x1 + w2*x2 + b);

  if(loss < 0) loss = 0;
    return loss;
}

// slope:a, intercept:b, derivative of w: dw, derivative of intercept: db
double getSVMCost(vector<double> &x1, vector<double> &x2, vector<int> &y, double w1, double w2, double b, double &dw1, double &dw2, double &db)
{
  int n = static_cast<int>(y.size());
  // hinge loss
  double cost=0;
  dw1 = 0;
  dw2 = 0;
  db = 0;
  for(int i = 0; i<n;i++)
  {
    double loss = getHingeLoss(x1[i], x2[i], y[i], w1, w2, b);
    cost += loss;
    // when loss = 0, all derivatives are 0
    if(loss > 0)
    {
      dw1 += (-x1[i]*y[i]);
      dw2 += (-x2[i]*y[i]);
      db += (-y[i]);
    }
  }
  cost /= n;
  dw1 /= n;
  dw2 /= n;
  db /=n;
  return cost;
}

void trainSVM(vector<double> &x1, vector<double> &x2, vector<int> &y)
{
  double lrate = 0.0005;
  double threshold = 0.001;
  double w1 = 1; double w2 = 1;
  double b = 0;  
  double dw1 = 0; double dw2 = 0;
  double db = 0;
  int iter = 0;
  while(true)
  {
    double cost = getSVMCost(x1, x2, y, w1, w2, b, dw1, dw2, db);
    if(iter%1000==0)
    {
      cout<<”Iter: “<<iter<< “ cost = “<<cost<< “ dw1 = “ << dw1 << “ dw2 = “ << dw2 << “ db = “<<db<< endl;
    }
    iter++;
    if(abs(dw1) < threshold && abs(dw2) < threshold && abs(db) < threshold)
    {
      cout<<”y = “<<w1<<” * x1 + “<<w2<<” * x2 + “<<b<<endl;
      break;
    }
    w1 -= lrate* dw1;
    w2 -= lrate* dw2;
    b -= lrate * db;
  }
}

// 나이, 소득에 따라 집 구매 여부를 구분하는 SVM 모델 생성의 예
int main() {
  // age
  vector<double> X1 = {35,27,19,25,26,45,46,48,47,29,27,28,27,30,28,23,27,18};
  // income in K
  vector<double> X2 = {20,57,76,33,52,26,28,29,49,43,137,44,90,49,84,20,54,44};
  // buy a house
  vector<int> Y = {-1, -1, -1, -1, -1, 1, 1, 1, 1, -1, 1, -1, -1, -1, -1, -1, -1, -1 };
  trainSVM(X1, X2, Y);
  return 0;
}


파이썬 기반 SVM 함수 사용방법
SVM을 사용하기 위해 보통 다음과 같이 기존 개발된 라이브러리를 사용한다.
아래는 Scikit-learn을 사용한 SVM예제이다.
from sklearn import svm
X = [[0, 0], [1, 1]]
y = [0, 1]
clf = svm.SVC()
clf.fit(X, y)
clf.predict([[2., 2.]])
clf.support_vectors_
# get indices of support vectors
clf.support_
# get number of support vectors for each class
clf.n_support_

다음은 개, 고양이 이미지에서 히스토그램 등 특징을 추출해, SVM으로 학습하는 방법을 설명한 내용이다. 단, 이미지 같은 비정형 데이터의 경우, 딥러닝 보다는 정확도가 높지 않다.

마무리
SVM은 이미 많은 곳에 사용되고 있는 검증된 머신러닝 기반 분류 기술로, 파이썬 등 다양한 언어에 라이브러리로 포함되어 있어 사용이 매우 편리하다. 분류에 사용되는 수치해석도 성능이 좋아 실시간에 필요한 분류 기능일 경우에는 좋은 대안이 될 수 있다. 앞에서 언급한 정도의 분류 문제라면 굳이 많은 노력이 필요한 딥러닝 대신 유용하게 활용할 수 있을 것이다.

2020년 7월 3일 금요일

뼈대 예측 딥러닝 모델 OpenPose 설치, 구조 분석 및 사용하기

오픈포즈는 카메라 이미지로만 다음 그림과 같이 사람의 뼈대를 추출하는 딥러닝 모델이다. 오픈포즈는 CVPR(Computer Vision and Pattern Recognition) 2017에서 발표한 기술로, 카네기멜론 대학교에서 개발되었다. CNN(Convolutional Neural Network) 기반으로 관절과 뼈대를 예측한다. 이 글은 오픈포즈 설치, 구조 분석 및 사용 방법을 간단히 나눔한다.

빌드 및 설치
소스코드는 다음과 같이 다운로드 할 수 있다. 

멀티 플랫폼을 지원하므로 윈도우에서도 실행할 수 있다. 단, 데이터 학습을 위해서는 Caffe 를 사용하므로 미리 설치하고 빌드해야 한다. 이와 관련해, 다음 링크를 참고해 설치 및 실행해 본다.
만약, 빌드가 불편하다면, 윈도우즈 버전을 설치해 사용할 수도 있다. 설치는 다음 링크를 참고한다.
설치 후 모델파일을 준비한다. 모델파일은 다음 링크를 참고해 다운로드한다. 
만약, 앞서 설치가 쉽지 않다면, 다음 CoLab 환경에서 실행해보기를 바란다. 다만, 실제 활용을 위해서는 빌드 및 설치는 해야 한다.

기능 및 자료 구조 분석
오픈포즈는 다음과 같이 사람의 몸, 혹은 얼굴과 손을 함께 인식할 수 있다.  --write_json 옵션을 추가하면, json파일로 해당 정보가 출력된다. --display 가 0이면 화면 출력 기능은 OFF할 수 있다. 
# Only body
./build/examples/openpose/openpose.bin --write_json output/ 
./build/examples/openpose/openpose.bin --video examples/media/video.avi --write_json output/ --display 0 --render_pose 0
# Body + face + hands
./build/examples/openpose/openpose.bin --video examples/media/video.avi --write_json output/ --display 0 --render_pose 0 --face --hand

출력된 json파일에는 각 관절 keypoint가 저장된다.
입력 이미지
키포인트 파일
키포인트파일 형식(참고)

json 파일 구조는 다음과 같다.
  • pose_keypoints_2d: 몸체 위치가 x1, y1, c1, x2, y2, c2,... 와 같이 배열로 저장됨. x, y는 픽셀위치이나 0 ~ 1, -1 ~ 0 과 같이 정규화될 수 있음(keypoint_scale 옵션에 따라). c는 신뢰도로 0 ~ 1 사이값.
참고로, 각 키포인트 배열 위치 의미는 다음과 같다. 이 형식을 BODY_25 구조라 한다(참고 - OpenPose Demo Output).
//     {0,  "Nose"},//     {1,  "Neck"},//     {2,  "RShoulder"},//     {3,  "RElbow"},//     {4,  "RWrist"},//     {5,  "LShoulder"},//     {6,  "LElbow"},//     {7,  "LWrist"},//     {8,  "MidHip"},//     {9,  "RHip"},//     {10, "RKnee"},//     {11, "RAnkle"},//     {12, "LHip"},//     {13, "LKnee"},//     {14, "LAnkle"},//     {15, "REye"},//     {16, "LEye"},//     {17, "REar"},//     {18, "LEar"},//     {19, "LBigToe"},//     {20, "LSmallToe"},//     {21, "LHeel"},//     {22, "RBigToe"},//     {23, "RSmallToe"},//     {24, "RHeel"},//     {25, "Background"}
BODY_25 의미

다음 키포인트 데이터의 경우, Nose(0), REye(15), LEye(16), REar(17), LEar(18)이 출력된 것을 확인할 수 있다.

만약, 렌더링 이미지를 저장하고 싶다면 --write_video 옵션을 사용하면 된다.
./build/examples/openpose/openpose.bin --video examples/media/video.avi --write_video output/result.avi --write_json output/
./build/examples/openpose/openpose.bin --video clockwork.avi --write_video output/result.avi

다음은 오픈포즈 옵션을 설명한 것이다(참고).
--face: 얼굴 추출
--hand: 손 추출
--video input.mp4: 비디오 읽기
--camera 3: 3번 카메라 읽기
--image_dir path_to_images/: 폴더 내 이미지 입력
--ip_camera http://iris.not.iac.es/axis-cgi/mjpg/video.cgi?resolution=320x240?x.mjpeg: IP 카메라 입력
--write_video path.avi: 비디오 저장
--write_images folder_path: 폴더 내 이미지 출력
--write_keypoint path/: Output JSON, XML or YML files with the people pose data on a folder.
--process_real_time: For video, it might skip frames to display at real time.
--disable_blending: If enabled, it will render the results (keypoint skeletons or heatmaps) on a black background, not showing the original image. Related: part_to_show, alpha_pose, and alpha_pose.
--part_to_show: Prediction channel to visualize.
--display 0: Display window not opened. Useful for servers and/or to slightly speed up OpenPose.
--num_gpu 2 --num_gpu_start 1: Parallelize over this number of GPUs starting by the desired device id. By default it uses all the available GPUs.
--model_pose MPI: Model to use, affects number keypoints, speed and accuracy.
--logging_level 3: Logging messages threshold, range [0,255]: 0 will output any message & 255 will output none. Current messages in the range [1-4], 1 for low priority messages and 4 for important ones.

활용 방법
오픈포즈를 특정 어플리케이션에서 활용하려면 다음과 같은 실행 작업흐름을 고려할 수 있다.
  • 오픈포즈 수행: 오픈포즈 옵션 설정 - 이미지 입력 - 오픈포즈 실행 - 키포인트 생성 - 키포인트 정규화 - 키포인트 출력
  • 응용 서비스 실행: 키포인트 파싱 - 키포인트 패턴 매칭을 통한 패턴 범주 계산 - 패턴 범주에 따른 정보 생성 및 저장 - 패턴 범주 정보 사용 

실행 결과
다양한 입력에 대한 실행결과는 다음과 같다.
OpenPoseDemo 

다음은 영상을 입력한 결과이다.
OpenPoseDemo --video video.mp4

전반적으로 뼈대가 잘 인식되는 것을 알 수 있다. 참고로, openpose 설치 bin 폴더에는 다양한 실행 예제가 포함되어 있다.
01_body_from_image_default 실행화면

마무리
OpenPose는 대체적으로 밝은 조명과 명확한 실내 사람들 이미지에서는 잘 인식된다. 사람이 전혀 없는 장면에서 몇몇 노이즈가 있다. 군중은 개별적으로 사람을 인식하지는 못한다.

Reference

CUDA, cuDNN 설치, 버전 확인 및 개발

CUDA 설치 및 버전 확인
CUDA(Compute Unified Device Architecture)는 계산 병렬처리를 지원하는 NVIDIA GPU 아키텍처이며 프로그래밍 기술이다. 

CUDA와 CUDnn은 운영체제 및 버전에 맞게 엔비디아 사이트에서 다운로드 받고 설치해야 한다.
만약, 아나콘다로 설치하려면 다음 명령을 입력한다.
conda install cudatoolkit
conda install cudnn

설치 후 cudnn.h 파일 중 아래 부분을 수정한다.
#include "driver_types.h"   >   #include <driver_types.h>

아래와 같이 쉘 파일을 편집해 경로를 추가한다.
gedit ~/.bashrc
export PATH="/home/ktw/anaconda3/bin:$PATH"
export PATH="/usr/local/cuda-10.0/bin:$PATH"
export PATH="/usr/local/cuda-10.0/lib64:$PATH"
export LD_LIBRARY_PATH="/usr/local/cuda-10.0/lib64:$LD_LIBRARY_PATH"
export LIBRARY_PATH="/usr/local/cuda-10.0/lib64:$LIBRARY_PATH"

환경변수를 체크한다.
printenv

제대로 설치되었는 지 버전 등 체크한다.
검색 설
cd /usr/local/cuda-xx.x/lib64
ls
cat /usr/local/cuda/version.txt
nvcc  --version
cat /usr/local/cuda/include/cudnn.h | grep CUDNN_MAJOR -A 2

예제를 아래 폴더에서 home 폴더로 복사한다.
/usr/src/cudnn_sample_v7

cudnn 폴더 아래 mnist 예제 폴더안에서 다음 같이 메이크한다.
make

빌드된 결과를 실행하면 다음 결과를 얻을 수 있다.

개발 방법
CUDA는 다음 그림과 같이 쓰레드, 블록 개념을 이용해 병렬처리할 수 있다. 각 이미지 픽셀에 특정 필터 연산을 하는 등의 작업 시간을 크게 줄일 수 있다.

CUDA는 병렬로 단위연산이 가능한 실수형 연산에 특화된 계산유닛을 제어할 수 있는 아키텍처로 설계되어 있다. GPU내에는 여러 개의 멀티프로세서가 존재하는데, 하나의 멀티프로세서에서 작동되는 스레드의 모음을 블록이라고 한다. 각 유닛은 스래드로 불리고, 다차원 연산이 가능하도록 블럭으로 스래드를 묶여 관리한다. 즉, Block과 Thread는 GPU 코드를 병렬로 처리하기 위한 단위로서 1개 블록은 N개 쓰레드로 구성된다.

CUDA는 병렬처리 대상이 데이터이므로, 데이터를 행렬이나 다차원 텐서로 표현해, 각 컴포넌트를 병렬처리할 수 있도록 함수를 정의하는 방법을 제공한다. 그러므로, 함수는 공동으로 사용되며, 함수의 입출력 데이터가 보관되는 메모리만 호스트 메모리(PC. CPU)와 디바이스 메모리(GPU)로 복사 전환하는 함수를 제공해 GPU에서 병렬 연산시 GPU메모리에 있는 데이터를 입출력할 수 있도록 하였다. 

그러므로, 프로그래밍 시 정의되는 함수는 호스트와 디바이스 모두 실행되거나 각 영역에서만 실행되는 표식(키워드)가 필요하며, 다음 그림과 같이 CPU 와 GPU 메모리 사이를 교환할 수 있는 메모리 관리 API가 제공되어야 한다. CUDA TOOLKIT 은 이를 제공하는 라이브러리와 컴파일러의 패키지이다. 


GPU프로그래밍에서 kernel(커널)은 병렬 실행되는 명령 집합을 의미한다. 다음과 같음 커널 함수를 코딩하는 경우, 블록갯수 B와 스레드수 S를 지정해주도록 한다.

func<<<B, S>>>();

아울러, __global__ 키워드를 함수 앞에 붙여서, GPU 동작 함수임을 명시해줘야 한다. 이 키워드를 이용해 CUDA 컴파일러인 NVCC가 입력되는 소스코드에서 함수들을 구분해 CPU 기계어, GPU 기계어로 오브젝트 바이너리 파일을 생성할 수 있다.

NVIDIA는 게임 렌더링에 특화되어 발전되었으므로, VERTEX BUFFER와 같이 3차원 형상을 계산하고 렌더링할 때 필요한 자료구조와 함수를 추가적으로 제공한다.

CUDA TOOLKIT 을 설치하고, 해당 버전에 맞는 VISUAL STUDIO를 설치하면, 관련된 기능 개발이 가능하다.

쿠다 프로그래밍 예시
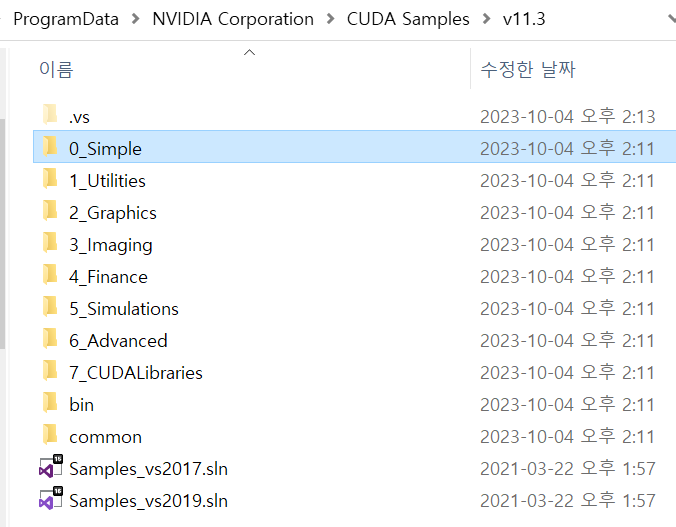
개발 툴킷을 설치하면, 다음과 같은 예제를 실행해 볼 수 있다.


다음은 병렬 연산에서 주로 많이 적용되는 벡터 더하기 계산 예제이다. 

#include <stdio.h>
#include <cuda_runtime.h>
#include <helper_cuda.h>

__global__ void vectorAdd(const float *A, const float *B, float *C, int numElements)
{
    int i = blockDim.x * blockIdx.x + threadIdx.x;  // 병렬처리 시 사용되는 유닛 인덱스 계산

    if (i < numElements)
        C[i] = A[i] + B[i];  // 해당 유닛마다 덧셈 실수 연산 처리
}

int main(void)
{
    cudaError_t err = cudaSuccess;

    int numElements = 50000;   // 5만개 실수 연산 
    size_t size = numElements * sizeof(float);  
    printf("[Vector addition of %d elements]\n", numElements);

    // 호스트 CPU 메모리 할당
    float *h_A = (float *)malloc(size);  // 입력1
    float *h_B = (float *)malloc(size);  // 입력2
    float *h_C = (float *)malloc(size);  // 출력

    if (h_A == NULL || h_B == NULL || h_C == NULL)
    {
        fprintf(stderr, "Failed to allocate host vectors!\n");
        exit(EXIT_FAILURE);
    }

    for (int i = 0; i < numElements; ++i)  // 램덤값으로 초기화
    {
        h_A[i] = rand()/(float)RAND_MAX;
        h_B[i] = rand()/(float)RAND_MAX;
    }

    float *d_A = NULL;
    err = cudaMalloc((void **)&d_A, size);  // CUDA GPU 메모리도 할당
    if (err != cudaSuccess)
    {
        fprintf(stderr, "Failed to allocate device vector A (error code %s)!\n", cudaGetErrorString(err));
        exit(EXIT_FAILURE);
    }

    float *d_B = NULL;
    err = cudaMalloc((void **)&d_B, size);
    if (err != cudaSuccess)
    {
        fprintf(stderr, "Failed to allocate device vector B (error code %s)!\n", cudaGetErrorString(err));
        exit(EXIT_FAILURE);
    }

    float *d_C = NULL;
    err = cudaMalloc((void **)&d_C, size);
    if (err != cudaSuccess)
    {
        fprintf(stderr, "Failed to allocate device vector C (error code %s)!\n", cudaGetErrorString(err));
        exit(EXIT_FAILURE);
    }

    printf("Copy input data from the host memory to the CUDA device\n");
    err = cudaMemcpy(d_A, h_A, size, cudaMemcpyHostToDevice);  // CPU > GPU 메모리로 값 복사

    if (err != cudaSuccess)
    {
        fprintf(stderr, "Failed to copy vector A from host to device (error code %s)!\n", cudaGetErrorString(err));
        exit(EXIT_FAILURE);
    }

    err = cudaMemcpy(d_B, h_B, size, cudaMemcpyHostToDevice);
    if (err != cudaSuccess)
    {
        fprintf(stderr, "Failed to copy vector B from host to device (error code %s)!\n", cudaGetErrorString(err));
        exit(EXIT_FAILURE);
    }

    // 병렬처리 커널함수 실행
    int threadsPerBlock = 256;
    int blocksPerGrid =(numElements + threadsPerBlock - 1) / threadsPerBlock;
    printf("CUDA kernel launch with %d blocks of %d threads\n", blocksPerGrid, threadsPerBlock);
    vectorAdd<<<blocksPerGrid, threadsPerBlock>>>(d_A, d_B, d_C, numElements);  // 병렬처리 커널함수
    err = cudaGetLastError();

    if (err != cudaSuccess)
    {
        fprintf(stderr, "Failed to launch vectorAdd kernel (error code %s)!\n", cudaGetErrorString(err));
        exit(EXIT_FAILURE);
    }

    // 계산 결과를 GPU에서 CPU메모리로 복사
    printf("Copy output data from the CUDA device to the host memory\n");
    err = cudaMemcpy(h_C, d_C, size, cudaMemcpyDeviceToHost);

    if (err != cudaSuccess)
    {
        fprintf(stderr, "Failed to copy vector C from device to host (error code %s)!\n", cudaGetErrorString(err));
        exit(EXIT_FAILURE);
    }

    // 계산 결과 검증
    for (int i = 0; i < numElements; ++i)
    {
        if (fabs(h_A[i] + h_B[i] - h_C[i]) > 1e-5)  // 실수 연산이므로, 특정 소숫점 자리수 이하로는 차이 발생함
        {
            fprintf(stderr, "Result verification failed at element %d!\n", i);
            exit(EXIT_FAILURE);
        }
    }

    printf("Test PASSED\n");

    // 메모리 해제
    err = cudaFree(d_A);
    if (err != cudaSuccess)
    {
        fprintf(stderr, "Failed to free device vector A (error code %s)!\n", cudaGetErrorString(err));
        exit(EXIT_FAILURE);
    }

    err = cudaFree(d_B);
    if (err != cudaSuccess)
    {
        fprintf(stderr, "Failed to free device vector B (error code %s)!\n", cudaGetErrorString(err));
        exit(EXIT_FAILURE);
    }

    err = cudaFree(d_C);
    if (err != cudaSuccess)
    {
        fprintf(stderr, "Failed to free device vector C (error code %s)!\n", cudaGetErrorString(err));
        exit(EXIT_FAILURE);
    }

    // Free host memory
    free(h_A);
    free(h_B);
    free(h_C);

    printf("Done\n");
    return 0;
}

다음은 프로그램 실행 결과이다. CPU 사용해 계산하는 것 보다 훨씬 빠르게 계산하는 것을 알 수 있다.

다음은 쿠다 기반 OPEN GL 렌더링의 간단한 예제이다. 

#include <stdlib.h>
#include <stdio.h>
#include <string.h>
#include <math.h>

#ifdef _WIN32
#  define WINDOWS_LEAN_AND_MEAN
#  define NOMINMAX
#  include <windows.h>
#endif

// OpenGL Graphics includes
#include <helper_gl.h>
#include <GL/freeglut.h>

// includes, cuda
#include <cuda_runtime.h>
#include <cuda_gl_interop.h>

// Utilities and timing functions
#include <helper_functions.h>    // includes cuda.h and cuda_runtime_api.h

// CUDA helper functions
#include <helper_cuda.h>         // helper functions for CUDA error check

#include <vector_types.h>

#define MAX_EPSILON_ERROR 10.0f
#define THRESHOLD          0.30f
#define REFRESH_DELAY     10 //ms

// 해상도 변수
const unsigned int window_width  = 512;
const unsigned int window_height = 512;

const unsigned int mesh_width    = 256;
const unsigned int mesh_height   = 256;

// 정점 버퍼 vbo 변수 정의
GLuint vbo;
struct cudaGraphicsResource *cuda_vbo_resource;
void *d_vbo_buffer = NULL;

float g_fAnim = 0.0;

// mouse controls
int mouse_old_x, mouse_old_y;
int mouse_buttons = 0;
float rotate_x = 0.0, rotate_y = 0.0;
float translate_z = -3.0;

StopWatchInterface *timer = NULL;

// Auto-Verification Code
int fpsCount = 0;        // FPS count for averaging
int fpsLimit = 1;        // FPS limit for sampling
int g_Index = 0;
float avgFPS = 0.0f;
unsigned int frameCount = 0;
unsigned int g_TotalErrors = 0;
bool g_bQAReadback = false;

int *pArgc = NULL;
char **pArgv = NULL;

#define MAX(a,b) ((a > b) ? a : b)

// 함수 선언
bool runTest(int argc, char **argv, char *ref_file);
void cleanup();

bool initGL(int *argc, char **argv);
void createVBO(GLuint *vbo, struct cudaGraphicsResource **vbo_res,
               unsigned int vbo_res_flags);
void deleteVBO(GLuint *vbo, struct cudaGraphicsResource *vbo_res);

// OPEN GL 렌더링 콜백 함수
void display();
void keyboard(unsigned char key, int x, int y);
void mouse(int button, int state, int x, int y);
void motion(int x, int y);
void timerEvent(int value);

// Cuda functionality
void runCuda(struct cudaGraphicsResource **vbo_resource);
void runAutoTest(int devID, char **argv, char *ref_file);
void checkResultCuda(int argc, char **argv, const GLuint &vbo);

const char *sSDKsample = "simpleGL (VBO)";

// 각 정점에 대해, 정점 데이터를 처리하는 BLOCK, THREAD X, Y 위치를 입력받고, 
// SIN, COS함수를 통과해, Y값인 W값을 계산해, POS에 저장함.
// 각 위치 데이터 계산을 병렬처리하므로, 전체 실수 연산 시간이 크게 줄어듬을 보여줌. 
__global__ void simple_vbo_kernel(float4 *pos, unsigned int width, unsigned int height, float time)
{
    unsigned int x = blockIdx.x*blockDim.x + threadIdx.x;
    unsigned int y = blockIdx.y*blockDim.y + threadIdx.y;

    // calculate uv coordinates
    float u = x / (float) width;
    float v = y / (float) height;
    u = u*2.0f - 1.0f;
    v = v*2.0f - 1.0f;

    // calculate simple sine wave pattern
    float freq = 4.0f;
    float w = sinf(u*freq + time) * cosf(v*freq + time) * 0.5f;

    // write output vertex
    pos[y*width+x] = make_float4(u, w, v, 1.0f);
}

// 매 시간에 대한 메쉬의 정점 높이값을 실수 계산, 병렬 처리.
void launch_kernel(float4 *pos, unsigned int mesh_width,
                   unsigned int mesh_height, float time)
{
    // execute the kernel
    dim3 block(8, 8, 1);
    dim3 grid(mesh_width / block.x, mesh_height / block.y, 1);
    simple_vbo_kernel<<< grid, block>>>(pos, mesh_width, mesh_height, time);  // 블록과 스레드 유닛 병렬처리
}

// GPU 지원 여부 확인
bool checkHW(char *name, const char *gpuType, int dev)
{
    cudaDeviceProp deviceProp;
    cudaGetDeviceProperties(&deviceProp, dev);
    strcpy(name, deviceProp.name);

    if (!STRNCASECMP(deviceProp.name, gpuType, strlen(gpuType)))
    {
        return true;
    }
    else
    {
        return false;
    }
}

// 메인 함수
int main(int argc, char **argv)
{
    char *ref_file = NULL;

    pArgc = &argc;
    pArgv = argv;

    printf("%s starting...\n", sSDKsample);

    if (argc > 1)
    {
        if (checkCmdLineFlag(argc, (const char **)argv, "file"))
        {
            getCmdLineArgumentString(argc, (const char **)argv, "file", (char **)&ref_file);
        }
    }

    printf("\n");

    runTest(argc, argv, ref_file);

    printf("%s completed, returned %s\n", sSDKsample, (g_TotalErrors == 0) ? "OK" : "ERROR!");
    exit(g_TotalErrors == 0 ? EXIT_SUCCESS : EXIT_FAILURE);
}

void computeFPS()
{
    frameCount++;
    fpsCount++;

    if (fpsCount == fpsLimit)
    {
        avgFPS = 1.f / (sdkGetAverageTimerValue(&timer) / 1000.f);
        fpsCount = 0;
        fpsLimit = (int)MAX(avgFPS, 1.f);

        sdkResetTimer(&timer);
    }

    char fps[256];
    sprintf(fps, "Cuda GL Interop (VBO): %3.1f fps (Max 100Hz)", avgFPS);
    glutSetWindowTitle(fps);
}

// 일반적인 GL 렌더링 초기화 함수
bool initGL(int *argc, char **argv)
{
    glutInit(argc, argv);
    glutInitDisplayMode(GLUT_RGBA | GLUT_DOUBLE);
    glutInitWindowSize(window_width, window_height);
    glutCreateWindow("Cuda GL Interop (VBO)");
    glutDisplayFunc(display);
    glutKeyboardFunc(keyboard);
    glutMotionFunc(motion);
    glutTimerFunc(REFRESH_DELAY, timerEvent,0);

    // initialize necessary OpenGL extensions
    if (! isGLVersionSupported(2,0))
    {
        fprintf(stderr, "ERROR: Support for necessary OpenGL extensions missing.");
        fflush(stderr);
        return false;
    }

    // default initialization
    glClearColor(0.0, 0.0, 0.0, 1.0);
    glDisable(GL_DEPTH_TEST);

    // viewport
    glViewport(0, 0, window_width, window_height);

    // projection
    glMatrixMode(GL_PROJECTION);
    glLoadIdentity();
    gluPerspective(60.0, (GLfloat)window_width / (GLfloat) window_height, 0.1, 10.0);

    SDK_CHECK_ERROR_GL();

    return true;
}

// CUDA로 병렬 처리함
bool runTest(int argc, char **argv, char *ref_file)
{
    sdkCreateTimer(&timer);      // 타이머 생성
    int devID = findCudaDevice(argc, (const char **)argv);  // CUDA 장치 ID획득

    if (ref_file != NULL)
    {
        checkCudaErrors(cudaMalloc((void **)&d_vbo_buffer, mesh_width*mesh_height*4*sizeof(float)));  // GPU 메모리 할당
        runAutoTest(devID, argv, ref_file);
        checkResultCuda(argc, argv, vbo);

        cudaFree(d_vbo_buffer);
        d_vbo_buffer = NULL;
    }
    else
    {
        if (false == initGL(&argc, argv))
            return false;

        // register callbacks
        glutDisplayFunc(display);
        glutKeyboardFunc(keyboard);
        glutMouseFunc(mouse);
        glutMotionFunc(motion);
        glutCloseFunc(cleanup);

        createVBO(&vbo, &cuda_vbo_resource, cudaGraphicsMapFlagsWriteDiscard);  // VBO 생성
        runCuda(&cuda_vbo_resource);  // 병렬 처리

        glutMainLoop();
    }

    return true;
}

void runCuda(struct cudaGraphicsResource **vbo_resource)
{
    // map OpenGL buffer object for writing from CUDA
    float4 *dptr;
    checkCudaErrors(cudaGraphicsMapResources(1, vbo_resource, 0));
    size_t num_bytes;
    checkCudaErrors(cudaGraphicsResourceGetMappedPointer((void **)&dptr, &num_bytes,
                                                         *vbo_resource));

    // execute the kernel
    //    dim3 block(8, 8, 1);
    //    dim3 grid(mesh_width / block.x, mesh_height / block.y, 1);
    //    kernel<<< grid, block>>>(dptr, mesh_width, mesh_height, g_fAnim);

    launch_kernel(dptr, mesh_width, mesh_height, g_fAnim);  // 병렬 처리 계산

    // unmap buffer object
    checkCudaErrors(cudaGraphicsUnmapResources(1, vbo_resource, 0));
}

#ifdef _WIN32
#ifndef FOPEN
#define FOPEN(fHandle,filename,mode) fopen_s(&fHandle, filename, mode)
#endif
#else
#ifndef FOPEN
#define FOPEN(fHandle,filename,mode) (fHandle = fopen(filename, mode))
#endif
#endif

void sdkDumpBin2(void *data, unsigned int bytes, const char *filename)
{
    printf("sdkDumpBin: <%s>\n", filename);
    FILE *fp;
    FOPEN(fp, filename, "wb");
    fwrite(data, bytes, 1, fp);
    fflush(fp);
    fclose(fp);
}

// CUDA 계산 
void runAutoTest(int devID, char **argv, char *ref_file)
{
    char *reference_file = NULL;
    void *imageData = malloc(mesh_width*mesh_height*sizeof(float));

    // execute the kernel
    launch_kernel((float4 *)d_vbo_buffer, mesh_width, mesh_height, g_fAnim);

    cudaDeviceSynchronize();
    getLastCudaError("launch_kernel failed");

    checkCudaErrors(cudaMemcpy(imageData, d_vbo_buffer, mesh_width*mesh_height*sizeof(float), cudaMemcpyDeviceToHost));

    sdkDumpBin2(imageData, mesh_width*mesh_height*sizeof(float), "simpleGL.bin");
    reference_file = sdkFindFilePath(ref_file, argv[0]);

    if (reference_file &&
        !sdkCompareBin2BinFloat("simpleGL.bin", reference_file,
                                mesh_width*mesh_height*sizeof(float),
                                MAX_EPSILON_ERROR, THRESHOLD, pArgv[0]))
    {
        g_TotalErrors++;
    }
}

void createVBO(GLuint *vbo, struct cudaGraphicsResource **vbo_res,
               unsigned int vbo_res_flags)
{
    assert(vbo);

    // create buffer object
    glGenBuffers(1, vbo);
    glBindBuffer(GL_ARRAY_BUFFER, *vbo);

    // initialize buffer object
    unsigned int size = mesh_width * mesh_height * 4 * sizeof(float);
    glBufferData(GL_ARRAY_BUFFER, size, 0, GL_DYNAMIC_DRAW);

    glBindBuffer(GL_ARRAY_BUFFER, 0);

    // register this buffer object with CUDA
    checkCudaErrors(cudaGraphicsGLRegisterBuffer(vbo_res, *vbo, vbo_res_flags));

    SDK_CHECK_ERROR_GL();
}

void deleteVBO(GLuint *vbo, struct cudaGraphicsResource *vbo_res)
{

    // unregister this buffer object with CUDA
    checkCudaErrors(cudaGraphicsUnregisterResource(vbo_res));

    glBindBuffer(1, *vbo);
    glDeleteBuffers(1, vbo);

    *vbo = 0;
}

// CALL BACK 함수
void display()
{
    sdkStartTimer(&timer);

    // run CUDA kernel to generate vertex positions
    runCuda(&cuda_vbo_resource);

    glClear(GL_COLOR_BUFFER_BIT | GL_DEPTH_BUFFER_BIT);

    // set view matrix
    glMatrixMode(GL_MODELVIEW);
    glLoadIdentity();
    glTranslatef(0.0, 0.0, translate_z);
    glRotatef(rotate_x, 1.0, 0.0, 0.0);
    glRotatef(rotate_y, 0.0, 1.0, 0.0);

    // render from the vbo
    glBindBuffer(GL_ARRAY_BUFFER, vbo);
    glVertexPointer(4, GL_FLOAT, 0, 0);

    glEnableClientState(GL_VERTEX_ARRAY);
    glColor3f(1.0, 0.0, 0.0);
    glDrawArrays(GL_POINTS, 0, mesh_width * mesh_height);
    glDisableClientState(GL_VERTEX_ARRAY);

    glutSwapBuffers();

    g_fAnim += 0.01f;

    sdkStopTimer(&timer);
    computeFPS();
}

void timerEvent(int value)
{
    if (glutGetWindow())
    {
        glutPostRedisplay();
        glutTimerFunc(REFRESH_DELAY, timerEvent,0);
    }
}

void cleanup()
{
    sdkDeleteTimer(&timer);

    if (vbo)
    {
        deleteVBO(&vbo, cuda_vbo_resource);
    }
}

void keyboard(unsigned char key, int /*x*/, int /*y*/)
{
    switch (key)
    {
        case (27) :
            #if defined(__APPLE__) || defined(MACOSX)
                exit(EXIT_SUCCESS);
            #else
                glutDestroyWindow(glutGetWindow());
                return;
            #endif
    }
}

void mouse(int button, int state, int x, int y)
{
    if (state == GLUT_DOWN)
    {
        mouse_buttons |= 1<<button;
    }
    else if (state == GLUT_UP)
    {
        mouse_buttons = 0;
    }

    mouse_old_x = x;
    mouse_old_y = y;
}

void motion(int x, int y)
{
    float dx, dy;
    dx = (float)(x - mouse_old_x);
    dy = (float)(y - mouse_old_y);

    if (mouse_buttons & 1)
    {
        rotate_x += dy * 0.2f;
        rotate_y += dx * 0.2f;
    }
    else if (mouse_buttons & 4)
    {
        translate_z += dy * 0.01f;
    }

    mouse_old_x = x;
    mouse_old_y = y;
}

void checkResultCuda(int argc, char **argv, const GLuint &vbo)
{
    if (!d_vbo_buffer)
    {
        checkCudaErrors(cudaGraphicsUnregisterResource(cuda_vbo_resource));

        // map buffer object
        glBindBuffer(GL_ARRAY_BUFFER, vbo);
        float *data = (float *) glMapBuffer(GL_ARRAY_BUFFER, GL_READ_ONLY);

        // check result
        if (checkCmdLineFlag(argc, (const char **) argv, "regression"))
        {
            // write file for regression test
            sdkWriteFile<float>("./data/regression.dat",
                                data, mesh_width * mesh_height * 3, 0.0, false);
        }

        // unmap GL buffer object
        if (!glUnmapBuffer(GL_ARRAY_BUFFER))
        {
            fprintf(stderr, "Unmap buffer failed.\n");
            fflush(stderr);
        }

        checkCudaErrors(cudaGraphicsGLRegisterBuffer(&cuda_vbo_resource, vbo,
                                                     cudaGraphicsMapFlagsWriteDiscard));

        SDK_CHECK_ERROR_GL();
    }
}

실행 결과는 다음과 같다. 

이외, 파티클 시뮬레이션 등을 실행해 보면, 병렬 계산되어 실시간으로 렌더링되는 것을 볼 수 있다.

레퍼런스