2016년 6월 18일 토요일

다양한 센서 마운팅이 가능한 아두이노 기반 무선 제어 4WD 메카넘휠 로버 개발

이 글은 3차원 이미지 스캔 및 역설계 연구와 관련해, 3차원 이미지 스캔 센서 등을 마운팅할 수 있는 무선 제어 로버(rover) 개발에 관한 간단한 글이다.

1. 개요
이 글에서 사용한 로버 프레임은 4WD Mecanum Wheel Kit 이다. 이 프레임에는 아두이노 328이 포함되어 있어, 동작 방식을 코딩 할 수 있다. 이 키트 프레임의 특징은 다음과 같다.
  • 메카넘휠 특징상 몸체를 회전하지 않고, 좌우 및 대각선 방향 이동이 가능하다
  • 몸체가 크게 흔들리지 않고 이동하며, 좁은 장소 이동에 유리하다
  • 속도가 빠르지는 않으나, 무거운 물체를 안정적으로 옮길때 좋다
  • 아두이노 기반 제어라, 개발 편의성과 확장성이 있다
  • 바닥이 고른 곳이나 실내에 맞다
자세한 내용은 다음 사이트를 참고한다.
관련 사이트에는 다음과 같이, 개발에 필요한 기본 코드 등을 제공하고 있다.

570.9KB
4WD-60mm-Mecanum-Wheel-Robot-Kit-10021
 
610.3KB
Diagram_Mecanum4WD_V4.1
 
61.5KB
Nexus Automation 10021 Library Files
 
1.4KB
RB0021_Omni4WD_PID


2. 로버 제어 코드 업로드
로버 제어를 위해 제공되는 Nexus Automation 10021 Library Files에는 샘플파일이 포함되어 있다. 이를 이용해 로버 제어 코드를 개발하기 위해서는 몇가지 사전 준비가 필요하다.

1. Arduino IDE 1.0.4 다운로드 및 설치: 최신 아두이노 IDE 프로그램은 이 로버에 포함되어 있는 Arduino 328과 호환되지 않는다. 그래서, 오래된 버전을 사용해야 한다.
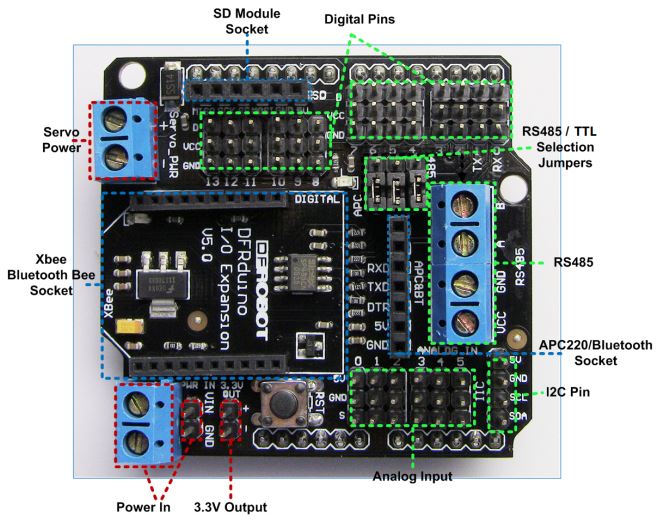
2. RS485 점퍼 제거: 아두이노 IDE에서 개발된 코드를 Arduino 328 보드에 전송하려면, 다음 그림의 아두이노 입출력 확장 보드의 RS485 점퍼를 제거해야 한다.


구글링을 통해, Arduino 포럼에서 점퍼가 다음 적색 박스에 있다는 것을 확인하였으나, 정확한 위치가 표시되어 있지는 않았다. 해당 점퍼를 제대로 제거하지 않으면, 코드가 전송되지 않는다.

RS485 점퍼들

할 수없이 무한조합을 통해, 다음과 같이 점퍼가 세팅되어 있을 때 코드가 제대로 보드에 업로드된다는 것을 확인하였다.

RS485 점퍼는 바로 앞 그림 속의 3개 점퍼 중 맨 위에 있는 것임 

3. Arduino IDE의 Arduino Duemilanove w/ ATmega328 설정: IDE에서 호환보드로 Arduino Duemilanove w/ ATmega328 를 다음 그림과 같이 설정해야 한다.


3. 로버 제어 코드 분석
로버 제어에 사용되는 라이브러리는 다음과 같이 구성되어 있다.

  • EEPROM: EEPROM에 데이터를 읽고 쓴다.
  • Firmata
  • MotorWheel: Motor wheel을 제어한다.
  • PID_Beta6: PID계산을 수행한다.
  • PinChangeInt: 아두이노 인터럽트 지원을 위한 확장 라이브러리이다.
  • Wire: TWI/I2C 라이브러리이다.

로버 제어 메인 코드는 다음과 같다.

#include <PinChangeInt.h>
#include <PinChangeIntConfig.h>
#include <EEPROM.h>
#define _NAMIKI_MOTOR //for Namiki 22CL-103501PG80:1
#include <fuzzy_table.h>
#include <PID_Beta6.h>
#include <MotorWheel.h>
#include <Omni4WD.h>

#include <fuzzy_table.h>
#include <PID_Beta6.h>

irqISR(irq1,isr1);
MotorWheel wheel1(3,2,4,5,&irq1);

irqISR(irq2,isr2);
MotorWheel wheel2(11,12,14,15,&irq2);

irqISR(irq3,isr3);
MotorWheel wheel3(9,8,16,17,&irq3);

irqISR(irq4,isr4);
MotorWheel wheel4(10,7,18,19,&irq4);

Omni4WD Omni(&wheel1,&wheel2,&wheel3,&wheel4);

void setup() {
//TCCR0B=TCCR0B&0xf8|0x01;    // warning!! it will change millis()
TCCR1B=TCCR1B&0xf8|0x01;      // Pin9,Pin10 PWM 31250Hz
TCCR2B=TCCR2B&0xf8|0x01;      // Pin3,Pin11 PWM 31250Hz
    
Omni.PIDEnable(0.31,0.01,0,10);
}

void loop() {
  // Omni.demoActions(100,1500,500,false);    
}

순서는 다음과 같다.

1. 각 바퀴(MotorWheel) 객체 별로 PWM, Dir, IRQ(interrupt request), ISR(interrupt service routine) 을 설정한다.
2. 각 바퀴 객체를 Omni4WD 객체에 설정한다.
3. setup() 함수에서 메카넘 휠 제어를 위한 PID 값을 설정한다.
4. loop() 함수에서 demo 동작을 수행한다.

각 바퀴를 제어하는 것은 Omni4WD 객체이다. 객체의 클래스 멤버는 다음과 같다.

Omni4WD(MotorWheel* wheelUL,MotorWheel* wheelLL,
MotorWheel* wheelLR,MotorWheel* wheelUR,unsigned int wheelspan=WHEELSPAN);
unsigned char switchMotors();
unsigned char switchMotorsReset();

unsigned int setMotorAll(unsigned int speedMMPS=0,bool dir=DIR_ADVANCE);
unsigned int setMotorAllStop();
unsigned int setMotorAllAdvance(unsigned int speedMMPS=0);
unsigned int setMotorAllBackoff(unsigned int speedMMPS=0);
unsigned int setCarStop(unsigned int ms=0);

int setCarMove(int speedMMPS,float rad,float omega=0);
int setCarAdvance(int speedMMPS=0);
int setCarBackoff(int speedMMPS=0);
int setCarLeft(int speedMMPS=0);
int setCarRight(int speedMMPS=0);

float setCarRotate(float omega);
int setCarRotateLeft(int speedMMPS=0);
int setCarRotateRight(int speedMMPS=0);

int setCarUpperLeft(int speedMMPS=0);
int setCarLowerLeft(int speedMMPS=0);
int setCarUpperRight(int speedMMPS=0);
int setCarLowerRight(int speedMMPS=0);

float getCarSpeedRad() const;
int getCarSpeedMMPS() const;
int setCarSpeedMMPS(int speedMMPS=0,unsigned int ms=1000);
int setCarSlow2Stop(unsigned int ms=1000);

int wheelULGetSpeedMMPS() const;
unsigned int wheelULSetSpeedMMPS(unsigned int speedMMPS,bool dir);
int wheelULSetSpeedMMPS(int speedMMPS);
int wheelLLGetSpeedMMPS() const;
unsigned int wheelLLSetSpeedMMPS(unsigned int speedMMPS,bool dir);
int wheelLLSetSpeedMMPS(int speedMMPS);
int wheelURGetSpeedMMPS() const;
unsigned int wheelURSetSpeedMMPS(unsigned int speedMMPS,bool dir);
int wheelURSetSpeedMMPS(int speedMMPS);
int wheelLRGetSpeedMMPS() const;
unsigned int wheelLRSetSpeedMMPS(unsigned int speedMMPS,bool dir);
int wheelLRSetSpeedMMPS(int speedMMPS);

bool PIDEnable(float kc=KC,float taui=TAUI,float taud=TAUD,unsigned int interval=1000);
bool PIDDisable(); // 201209
bool PIDGetStatus(); // 201209
float PIDGetP_Param(); // 201210
float PIDGetI_Param(); // 201210
float PIDGetD_Param(); // 201210
bool PIDRegulate();
void delayMS(unsigned int ms=100, bool debug=false,unsigned char* actBreak = 0);
void demoActions(unsigned int speedMMPS=100,unsigned int duration=5000,unsigned int uptime=500,bool debug=false);

이 중에 demoActions()함수가 데모 동작 제어를 하는 멤버이다. 이 함수를 좀 더 분석해 보자.

void Omni4WD::demoActions(unsigned int speedMMPS,unsigned int duration,
unsigned int uptime,bool debug) 
{
        // 데모 동작을 위한 함수 포인트 배열 설정. 차례대로, 전진, 후진, 좌로 이동, 우로 이동, 좌상단, 우하단
        // 좌하단, 우상단, 좌회전, 우회전 함수로 구성되어 있다.
int (Omni4WD::*carAction[])(int speedMMPS)={
&Omni4WD::setCarAdvance,
&Omni4WD::setCarBackoff,
&Omni4WD::setCarLeft,
&Omni4WD::setCarRight,
&Omni4WD::setCarUpperLeft,
&Omni4WD::setCarLowerRight,
&Omni4WD::setCarLowerLeft,
&Omni4WD::setCarUpperRight,
&Omni4WD::setCarRotateLeft,
&Omni4WD::setCarRotateRight
};  

        // 각 함수 포인트를 호출하고, 잠시 딜레이를 준다 (데모에서 호출된 시간은 1.5초이므로, 
        // 이 시간 동안, 각 함수 기능이 수행된다.
for(int i=0;i<10;++i) {
(this->*carAction[i])(0); // default parameters not available in function pointer
setCarSpeedMMPS(speedMMPS, uptime);
delayMS(duration, debug);
setCarSlow2Stop(uptime);  // 다음 동작 전에 천천히 멈춘다. 데모는 0.5초 동안이다. 
}
setCarStop();               // 완전히 멈춘다.
delayMS(duration);       // 지연을 둔다. 데모는 1.5초이다.
}

4. 로버 제어 동작 제어
로버 제어 코드는 다음과 같다.
이제 로버를 제어하는 주요 함수의 기능을 파악했으니, 간단히, 로버를 1.5초 직진한 후, 좌측으로 1.5초 이동해, 1.5초 멈추고, 다시 원 위치로 오는 동작을 코딩해 보자.

void loop() {
  // 각 함수 포인트를 호출하고, 잠시 딜레이를 준다 (데모에서 호출된 시간은 1.5초이므로, 
  // 이 시간 동안, 각 함수 기능이 수행된다.
  unsigned int speedMMPS = 100;
  unsigned int duration = 1500;
  unsigned int uptime = 500;
  bool debug = false;
  
  for(int i=0; i < 4; ++i) 
  {
    if(i == 0)
      Omni.setCarAdvance(0);
    else if(i == 1)
      Omni.setCarLeft(0);
    else if(i == 2)
      Omni.setCarRight(0);
    else
      Omni.setCarBackoff(0);

    Omni.setCarSpeedMMPS(speedMMPS, uptime);
    Omni.delayMS(duration, debug);
    Omni.setCarSlow2Stop(uptime);  // 다음 동작 전에 천천히 멈춘다. 데모는 0.5초 동안이다. 
  }
  
  Omni.setCarStop();            // 완전히 멈춘다.
  Omni.delayMS(duration);       // 지연을 둔다. 데모는 1.5초이다.    
}

이제 앞에처럼, 코딩한 것을 로버에 전송해 본다. 그리고, 로버의 파워 버튼을 눌러 본다. 다음과 같이 동작되면, 성공한 것이다.


5. 로버 무선 제어 
로버 무선 제어를 위해, 아두이노 확장 보드에 있는 Bluetooth 무선 통신 핀을 사용해 보자. 확장보드의 재원은 다음 링크를 참고한다.


사실, 이 확장보드 사용방법은 그리 친절하지 않다. 블루투스 통신을 위해서는 우선 HC-06같은 블루투스 통신 장치가 있어야 하며, 통신 속도 등을 미리 설정해 놓어야 한다. 이 경우에는 AT+BAUD8 명령으로 최고속도로 설정해 놓고, 아두이노 보드에서 시리얼 통신으로 정상 설정되었는 지 등을 여러번 테스트해 보는 과정을 거쳤다.

이제, 블루투스 통신 장치의 이름, 속도(115200), 암호(보통은 1234임) 등이 제대로 확인되었다면, 다음과 같은 순서로 로버 무선 통신을 개발해본다.

1. 다음과 같이 코딩하여, 로버의 아두이노 보드에 전송한다. 로버 컨트롤 코딩은 매우 간단하게, g(go), back(b), left(l), right(r), t1(turn left), t2(turn right)로 하였다.

#include <PinChangeInt.h>
#include <PinChangeIntConfig.h>
#include <EEPROM.h>
#define _NAMIKI_MOTOR //for Namiki 22CL-103501PG80:1
#include <fuzzy_table.h>
#include <PID_Beta6.h>
#include <MotorWheel.h>
#include <Omni4WD.h>

#include <fuzzy_table.h>
#include <PID_Beta6.h>

// #include <SoftwareSerial.h>
// SoftwareSerial mySerial(10, 11); // RX, TX

irqISR(irq1,isr1);
MotorWheel wheel1(3,2,4,5,&irq1);

irqISR(irq2,isr2);
MotorWheel wheel2(11,12,14,15,&irq2);

irqISR(irq3,isr3);
MotorWheel wheel3(9,8,16,17,&irq3);

irqISR(irq4,isr4);
MotorWheel wheel4(10,7,18,19,&irq4);


Omni4WD Omni(&wheel1,&wheel2,&wheel3,&wheel4);

boolean toggle = false;
void toggleLED()
{
  if(toggle == false)
    digitalWrite(13, HIGH);
  else
    digitalWrite(13, LOW);
  toggle = toggle ? false : true;
}

void setup() {
  //TCCR0B=TCCR0B&0xf8|0x01;    // warning!! it will change millis()
  TCCR1B=TCCR1B&0xf8|0x01;    // Pin9,Pin10 PWM 31250Hz
  TCCR2B=TCCR2B&0xf8|0x01;    // Pin3,Pin11 PWM 31250Hz

  Omni.PIDEnable(0.31,0.01,0,10);
  
  Serial.begin(115200);
  pinMode(13, OUTPUT);   
}

void loop() {
  // Omni.demoActions(100,1500,500,false);
  
  char val = 0;
  char string[256];
  int i = 0;
  while(Serial.available())
  {
    char ch = Serial.read();
    string[i] = ch;
    i++;
    if(ch == -1)
      break;
    delay(5);
  }
  string[i] = 0;


  unsigned int speedMMPS = 100;
  unsigned int duration = 1000;
  unsigned int uptime = 500;
  bool debug = false;

  if(strstr(string, "g"))
  {
    Omni.setCarAdvance(0);  
    Omni.setCarSpeedMMPS(speedMMPS, uptime);
    Omni.delayMS(duration, debug);
    Omni.setCarSlow2Stop(uptime);  
  }
  else if(strstr(string, "b"))
  {
    Omni.setCarBackoff(0);
    Omni.setCarSpeedMMPS(speedMMPS, uptime);
    Omni.delayMS(duration, debug);
    Omni.setCarSlow2Stop(uptime);  
  }
  else if(strstr(string, "l"))
  {
    Omni.setCarLeft(0);
    Omni.setCarSpeedMMPS(speedMMPS, uptime);
    Omni.delayMS(duration, debug);
    Omni.setCarSlow2Stop(uptime); 
  }
  else if(strstr(string, "r"))
  {
    Omni.setCarRight(0);
    Omni.setCarSpeedMMPS(speedMMPS, uptime);
    Omni.delayMS(duration, debug);
    Omni.setCarSlow2Stop(uptime); 
  }
  else if(strstr(string, "t1"))
  {
    Omni.setCarRotate(0);
    Omni.setCarRotateLeft(speedMMPS);
    Omni.delayMS(duration, debug);
    Omni.setCarSlow2Stop(uptime);  
  }
  else if(strstr(string, "t2"))
  {
    Omni.setCarRotate(0);
    Omni.setCarRotateRight(speedMMPS);
    Omni.delayMS(duration, debug);
    Omni.setCarSlow2Stop(uptime);
  }
  else if(strstr(string, "t"))
  {
    toggleLED();
  }
  
  Omni.setCarStop();            // 완전히 멈춘다. 
  Omni.delayMS(duration);    // 지연을 둔다. 데모는 1.5초이다.  
}

2. 확장보드의 APC 220/Bluetooth 핀을 본인이 가지고 있는 블루투스 송수신 장치와 연결
확장보드의 해당 핀들 중 RX, TX, VCC, GND만 연결하면 된다.

HC-06 블루투스의 경우, RX, TX, VCC, GND가 있으며, VCC, GND는 같은 핀에 연결하고, RX, TX만 서로 바꾸어 연결한다.

  VCC - VCC
  GND - GND
  RX - TX
  TX - RX

로버에 블루투스를 연결 모습

3. Bluetooth Terminal 앱을 안드로이드 폰이나 스마트 패드에 설치하고, 앞에서 연결한 블루투스와 페어링한 후, 이 앱을 실행해, 연결하고, 글자를 입력하여 테스트해본다. 정상적이면, 다음과 같이 무선으로 로버를 조정할 수 있다.

블루투스 무선 기반 로버 제어 테스트 화면

테스트를 위해, 블루투스 통신이 어렵도록 문을 닫고 테스트를 해 본다던지, 원거리에서 테스트해 보는 등의 과정을 거쳤으나, 큰 문제 없이 잘 동작된다. 보통, 블루투스는 탁 트인곳에서 20미터에서 최대 30미터까지 통신이 가능하다. 물론, 블루투스 통신이 많은 환경에서는 이름, 암호 등은 다르게 설정해야 혼선이 없다.

이제 로버에 무선 통신을 이용해 다양한 명령을 줄 수 있으니, 로버에 마운팅된 센서에서 데이터를 받거나, 액추에이터를 제어할 수 있다. 다만, 대용량 데이터가 필요한 센서의 경우에는 WiFi 등 좀 더 대역폭이 좋은 무선 통신 방식을 사용해야 한다.

다음 영상은 작업자가 진입하기 어려운 공간의 3차원 이미지 스캔을 위해 트림블사의 스캐너를 이 로버와 마운팅해 테스트한 영상이다.

3차원 이미지 스캔 기반 Inspection rover


로버 기반 3차원 이미지 스캐닝 결과

6. 마무리
이 글에서 사용된 로버의 제어 보드는 스펙이 좀 오래된 것이라, 점퍼 등 정확한 제원을 찾기가 어려웠다. 하지만, 가성비가 높고, 메카넘휠이 추가되어 있어, 안정적으로 이동하는 로버를 개발할 수 있다. 아울러, 많은 아두이노 라이브러리를 이용해, 센서와 연동하면, 더 강력한 로버를 개발할 수 있다는 점은 확장성 면에서 큰 장점이다.


원격 야외 이미지 스캔용 캐터필터 타입 로버 개발

이 글은 원격으로  간단한 야외 이미지 스캔 테스트 목적의 캐터필터 타입 로버에 대한 개발 정보를 간단히 정리한 것이다. 본 로버 개발에는 ROS, OpenCM, 로보티즈 다이나믹셀, RGBD센서 등이 사용되었다.

1. 개요
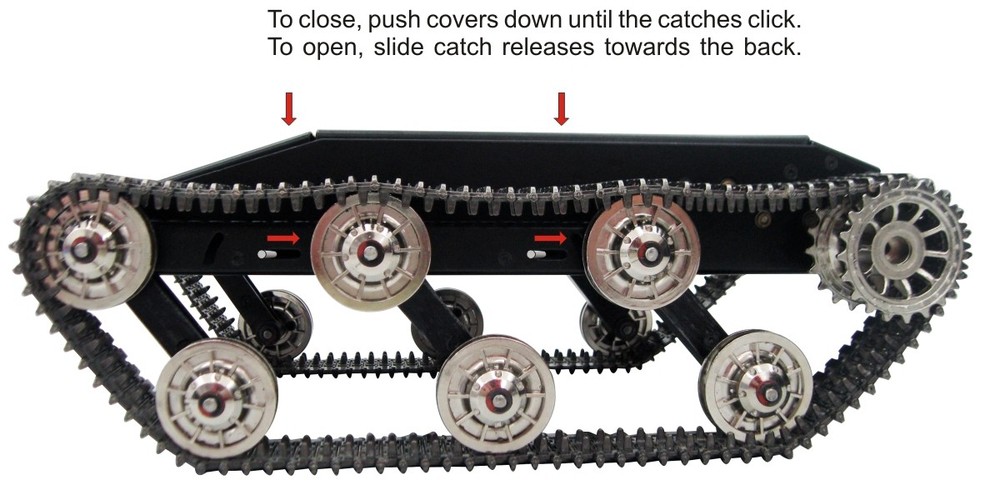
캐터필터 타입은 울퉁불퉁한 지형에서 효과적이고, 매우 빠른 속도로 지형을 주행할 수 있다. 본 글에서 소개하는 캐터필터 타입 로버는 DAGU T'REX 이다.


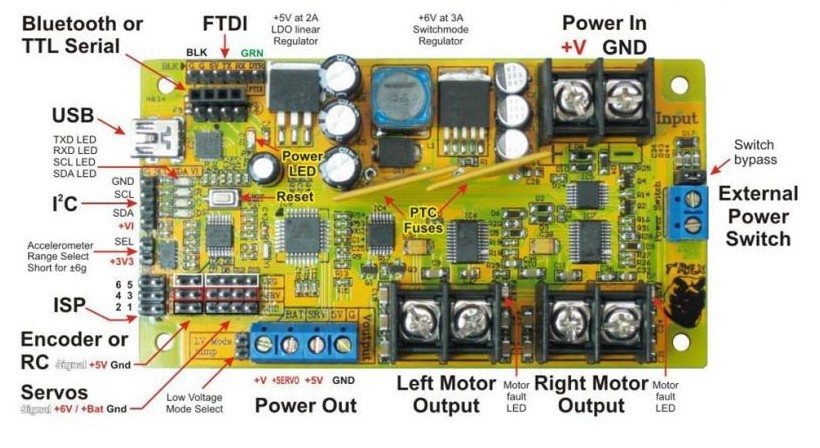
컨트롤러는 별도로 구입해 설치해야 하는 데, DAGU에서 T'REX controller 로 검색하면 발견할 수 있다.


아두이노 호환 보드라, 코딩이 쉽다. 그리고, 다음과 같이 메뉴얼, 코드, 소프트웨어를 제공한다.
기타 다음 링크를 참고하면 도움이 된다.

2. 소스 코드 분석
제공되는 기본 소스 코드는 아두이노 Arduino Nano w/ 328 보드 용이다. 코드 전체 리스트는 다음과 같다. 크게 setup과 loop로 나눠져 있으며, loop는 진단을 위한 동작 실행 함수(DiagnoticMode), 배터리가 낮을 때 셧다운 모드, RC 모드, 블루투스 모드 등으로 구성되어 있음을 알 수 있다.


#include <Wire.h>                                      // interrupt based I2C library
#include <Servo.h>                                     // library to drive up to 12 servos using timer1
#include <EEPROM.h>                                    // library to access EEPROM memory
#include "IOpins.h"                                    // defines which I/O pin is used for what function

// define constants here
#define startbyte 0x0F                   // for serial communications each datapacket must start with this byte

// define global variables here
byte mode=0;                                           // mode=0: I2C / mode=1: Radio Control / mode=2: Bluetooth / mode=3: Shutdown
int  lowbat=550;                                       // default low battery voltage is 5.5V
byte errorflag;                                        // non zero if bad data packet received
byte pwmfreq;                                          // value from 1-7
byte i2cfreq;                                          // I2C clock frequency can be 100kHz(default) or 400kHz
byte I2Caddress;                                       // I2C slave address
int lmspeed,rmspeed;                                   // left and right motor speeds -255 to +255
byte lmbrake,rmbrake;                                  // left and right brakes - non zero values enable brake
int lmcur,rmcur;                                       // left and right motor current
int lmenc,rmenc;                                       // left and right encoder values
int volts;                                             // battery voltage*10 (accurate to 1 decimal place)
int xaxis,yaxis,zaxis;                                 // X, Y, Z accelerometer readings
int deltx,delty,deltz;                                 // X, Y, Z impact readings 
int magnitude;                                         // impact magnitude
byte devibrate=50;   // number of 2mS intervals to wait after an impact has occured before a new impact can be recognized
int sensitivity=50;                                    // minimum magnitude required to register as an impact

byte RCdeadband=35;                                    // RCsignal can vary this much from 1500uS without controller responding
unsigned long time;                                    // timer used to monitor accelerometer and encoders

byte servopin[6]={7,8,12,13,5,6};                      // array stores IO pin for each servo
int servopos[6];                                       // array stores position data for up to 6 servos
Servo servo[6];                                        // create 6 servo objects as an array

void setup()
{
  //all IO pins are input by default on powerup --------- configure motor control pins for output -------- pwm autoconfigures -----------

  pinMode(lmpwmpin,OUTPUT);                            // configure left  motor PWM       pin for output
  pinMode(lmdirpin,OUTPUT);                            // configure left  motor direction pin for output
  pinMode(lmbrkpin,OUTPUT);                            // configure left  motor brake     pin for output
  
  pinMode(rmpwmpin,OUTPUT);                            // configure right motor PWM       pin for output
  pinMode(rmdirpin,OUTPUT);                            // configure right motor direction pin for output
  pinMode(rmbrkpin,OUTPUT);                            // configure right motor brake     pin for output
  
  //----------------------------------------------------- Test for RC inputs --------------------------------------------
  digitalWrite(RCspeedpin,1);                          // enable weak pullup resistor on input to prevent false triggering                   
  digitalWrite(RCsteerpin,1);                          // enable weak pullup resistor on input to prevent false triggering
  delay(100);
  int t1=int(pulseIn(RCspeedpin,HIGH,30000));          // read throttle/left stick
  int t2=int(pulseIn(RCsteerpin,HIGH,30000));          // read steering/right stick
  if(t1>1000 && t1<2000 && t2>1000 && t2<2000)         // RC signals detected - go to RC mode
  {
    mode=1;                                            // set mode to RC
    MotorBeep(3);                                      // generate 3 beeps from the motors to indicate RC mode enabled
  }
  
  //----------------------------------------------------- Test for Bluetooth module ----------------------------------
  if(mode==0)                                          // no RC signals detected
  {
    BluetoothConfig();                                 // attempts to configure bluetooth module - changes to mode 2 if successful
    if(mode==2) MotorBeep(2);                          // generate 2 beeps from the motors to indicate bluetooth mode enabled
  }
  
  //----------------------------------------------------- Configure for I²C control ------------------------------------
  if(mode==0)                                          // no RC signal or bluetooth module detected
  {
    MotorBeep(1);                                      // generate 1 beep from the motors to indicate I²C mode enabled
    byte i=EEPROM.read(0);                             // check EEPROM to see if I²C address has been previously stored
    if(i==0x55)                                        // B01010101 is written to the first byte of EEPROM memory to indicate that an I2C address has been previously stored
    {
      I2Caddress=EEPROM.read(1);                       // read I²C address from EEPROM
    }
    else                                               // EEPROM has not previously been used by this program
    {
      EEPROM.write(0,0x55);                            // set first byte to 0x55 to indicate EEPROM is now being used by this program
      EEPROM.write(1,0x07);                            // store default I²C address
      I2Caddress=0x07;                                 // set I²C address to default
    }
    
    Wire.begin(I2Caddress);                            // join I²C bus as a slave at I2Caddress
    Wire.onReceive(I2Ccommand);                        // specify ISR for data received
    Wire.onRequest(I2Cstatus);                         // specify ISR for data to be sent
  }
}

void loop()
{
  // DiagnosticMode();

  if (mode==3)                                         // if battery voltage too low
  {
    Shutdown();                                        // Shutdown motors and servos
    return;
  }
  
  //----------------------------------------------------- RC Mode -----------------------------------------------------
  if(mode==1)                                           
  {
    RCmode();                                          // monitor signal from RC receiver and control motors
    return;                                            // I²C, Bluetooth and accelerometer are ignored
  }
  
  //----------------------------------------------------- Bluetooth mode ----------------------------------------------
  if(mode==2)
  {
    Bluetooth();                                       // control using Android phone and sample app
    return;
  }
  
  //----------------------------------------------------- I²C mode -----------------------------------------------------
  static byte alternate;  // variable used to alternate between reading accelerometer and power analog inputs


  //----------------------------------------------------- Perform these functions every 1mS ------------------------
  if(micros()-time>999)                       
  {
    time=micros();                                     // reset timer
    alternate=alternate^1;                             // toggle alternate between 0 and 1
    Encoders();                                        // check encoder status every 1mS

    //-------- These functions must alternate as they both take in excess of 780uS ------------    
    if(alternate)
    {
      Accelerometer();                                 // monitor accelerometer every second millisecond                            
    }
    else 
    {
      lmcur=(analogRead(lmcurpin)-511)*48.83;  // read  left motor current sensor and convert reading to mA
      rmcur=(analogRead(rmcurpin)-511)*48.83; // read right motor current sensor and convert reading to mA
      volts=analogRead(voltspin)*10/3.357; // read battery level and convert to volts with 2 decimal places (eg. 1007 = 10.07 V)
      if(volts<lowbat) mode=3;                // change to shutdown mode if battery voltage too low
    }
  }
}

DiagnoticModel 함수는 좌측, 우측 캐터필러를 회전하도록 코딩되어 있다.

void DiagnosticMode()
{
  //---------------------------------------- Diagnostic Mode ------------------------------------//
  //  This simple routine runs the motors forward / backward and brakes to test the "H" bridges  //
  //  Battery voltage, accelerometer data and motor current draw is displayed on serial monitor  //
  //             When LEDs are connected to servo outputs they will chase in sequence            //
  //---------------------------------------------------------------------------------------------//
  
  static int mdir,mpwm,brk,LED,div;
  if(mdir==0)                             // first time through the loop mdir=0 
  {                                       // initialize diagnostic routine
    mdir=5;                               // motor direction cannot start at 0 or motors will not move   
    for(byte i=0;i<6;i++)                 // scan through servo pins
    {
      pinMode(servopin[i],OUTPUT);        // set servo pin to OUTPUT
    }
  }
  
  mpwm+=mdir;             // motor speed/direction is incremented/decremented by motor direction                   
  if(mpwm<-250 || mpwm>250)               // PWM value must be between -255 and +255
  {
    mdir=-mdir;                           // when limit is reached, reverse direction
    brk=1;                                // engage brake for quick slow down
  }
  if(mpwm==0) brk=0;                      // if motor PWM is 0 then disable the brake - motor can start again
  
  lmspeed=mpwm;                           // set left  motor speed
  rmspeed=mpwm;                           // set right motor speed
  lmbrake=brk;                            // enable / disable left  brake
  rmbrake=brk;                            // enable / disable right brake
  Motors();                               // update speed, direction and brake of left and right motors
  
  div++;                                  // divider used to slow down LED chasing
  if(div>20)
  {
    div=0;                                // reset divider
    LED++;                                // increment LED chase sequence
  }
  
  if(LED>5) LED=0;                        // cause chase sequence to repeat
  for(byte i=0;i<6;i++)                   // scan servo control pins
  {
    digitalWrite(servopin[i],LED==i);     // drive LEDs in chase sequence
  }
  
  Serial.print("Battery voltage: "); Serial.print(int(analogRead(voltspin)*10/3.357));Serial.print("\t");
  
  Serial.print("X: "); Serial.print(analogRead(axiszpin));Serial.print("\t");
  Serial.print("Y: "); Serial.print(analogRead(axisypin));Serial.print("\t");
  Serial.print("Z: "); Serial.print(analogRead(axisxpin));Serial.print("\t");
  
  lmcur=(analogRead(lmcurpin)-511)*48.83;
  rmcur=(analogRead(rmcurpin)-511)*48.83;
  Serial.print("Lmotor current: ");Serial.print(lmcur);Serial.print("mA\t");
  Serial.print("Rmotor current: ");Serial.print(rmcur);Serial.print("mA\t");
  Serial.print("PWM:");Serial.println(mpwm);
  delay(10);
}

코드를 분석하면, 알겠지만, 왼쪽, 오른쪽 회전에 관련된 전역변수인 lmspeed, rmspeed가 있으며, 여기에 속도를 넣고, Motors() 함수를 호출하면, 좌/우측 캐터필터가 회전하도록 되어 있음을 확인할 수 있다. 이는 블루투스 무선 통신 기반으로 동작을 제어하는 코드도 유사하다. 아래 블루투스 무선 통신 제어 코드는 속도를 앱으로 부터 전달받아, Motors() 함수를 호출한다.

void Bluetooth()
{
  static byte d,e;                                             // data and error bytes
  if(Serial.available()>2)                                     // Command is 3 bytes in length
  {
    d=Serial.read();                                           // read byte from buffer
    if(d!=startbyte)                                           // if byte is not a start byte (0x0F)
    {
      lmspeed=0;                                               // bad data received
      rmspeed=0;                                               // set motor speeds to 0
      e=0;                                                     // error flag reset
    }
    else
    {
      lmspeed=(int(Serial.read())-127)*2-1;                    // good data received
      rmspeed=(int(Serial.read())-127)*2-1;                    // read values for left and right motors
    }
  }
  else                                                         // less than 3 bytes in buffer
  {
    e++;                                                       // count program loops with less than 3 bytes in buffer
    if(e>100)                                        // assume lost signal if buffer less than 3 bytes for too long
    {
      lmspeed=0;                                               // stop left motor
      rmspeed=0;                                               // stop right motor
      e=0;                                                     // reset error counter
    }
  }
  Motors();                                                    // update motors 
}

블루투스 통신을 위해서, Serial 포트를 초기화해주어야 한다. 이는 mode란 전역변수가 0일 경우, 자동으로 컨트롤보드에 블루투스 장치가 있는 지 체크하고, 있으면 통신 속도 등을 기본으로 설정해 블루투스 컨트롤 모드임을 mode = 2로 표시한다. 다만, HC-06 블루투스 장치를 사용할 때는, 이 코드가 제대로 동작하지 않는다. 

void BluetoothConfig()  // This code intended for a DAGU bluetooth module - may not work with other 
{
  long baud[]={9600,115200,57600,38400,19200,4800,2400,1200};  // try 9600 first as this is default setting then try other baud rates
  byte br=0,d;
  while(mode==0 && br<8)                                       // scan through different baud rates and attempt to configure bluetooth module
  {
    Serial.begin(baud[br]);                                    // enable T'REX serial at baud rate baud[br]
    Serial.print("AT");                                        // send "AT" to see if bluetooth module is connected
   
    if(Serial.available()>1)                                   // after 1 second the bluetooth module should respond
    {
      byte i=Serial.read();                                    // should be 79 "O"
      delay(3);      
      byte j=Serial.read();                                    // should be 75 "K"
      if(i==79 && j==75)                                       // if response is "OK" then cofigure bluetooth module
      {
        EmptyBuffer();                                         // clear buffer
        Serial.print("AT+NAMET'REX");                          // ensure name is set to "T'REX"
        delay(1500);                                           // wait for bluetooth module to respond
        EmptyBuffer();                                         // clear buffer
        Serial.print("AT+PIN1234");                            // ensure PIN is set to "1234"
        delay(1500);                                           // wait for bluetooth module to respond
        EmptyBuffer();                                         // clear buffer
        if(br!=0)                                              // if bluetooth baud rate was not 9600
        { 
          Serial.print("AT+BAUD4");                            // set bluetooth baud rate to 9600
          delay(1500);                                         // wait for bluetooth module to respond
          EmptyBuffer();                                       // clear buffer
          Serial.end();                                        // close serial communications at current baud rate
          Serial.begin(9600);                                  // set T'REX controller serial communications to 9600
        }
        mode=2;                                                // bluetooth module successfully detected and configured - change to bluetooth mode
      }        
    }
    if(mode==0)                                                // bad response - bluetooth module not communicating at current baud rate
    {
      EmptyBuffer();
      Serial.end();                                            // close serial communications at this baud rate
      br++;                                                    // prepare to try next baud rate
    }
  } 

}

이런 이유로, HC-06과 같은 블루투스 장치의 경우에는 다음과 같이 코딩하여, 강제로 Serial 포트를 초기화하도록 한다.

void BluetoothConfig()  
{
  Serial.begin(9600);      // set T'REX controller serial communications to 9600
  Serial.flush();
  mode=2;           // bluetooth module successfully detected and configured - change to bluetooth mode

  delay(1500); 
}

모터 제어 코드는 다음과 같이 간단하다.

void Motors()
{
  digitalWrite(lmbrkpin,lmbrake>0);        // if left brake>0 then engage electronic braking for left motor
  digitalWrite(lmdirpin,lmspeed>0);        // if left speed>0 then left motor direction is forward else reverse
  analogWrite (lmpwmpin,abs(lmspeed));    // set left PWM to absolute value of left speed - if brake is engaged then PWM controls braking

  if(lmbrake>0 && lmspeed==0) lmenc=0;   // if left brake is enabled and left speed=0 then reset left encoder counter
  
  digitalWrite(rmbrkpin,rmbrake>0);       // if right brake>0 then engage electronic braking for right motor
  digitalWrite(rmdirpin,rmspeed>0);       // if right speed>0 then right motor direction is forward else reverse
  analogWrite (rmpwmpin,abs(rmspeed));  // set right PWM to absolute value of right speed - if brake is engaged then PWM controls braking

  if(rmbrake>0 && rmspeed==0) rmenc=0;   // if right brake is enabled and right speed=0 then reset right encoder counter
}

이 코드를 아두이노 기반 로버 컨트롤러에 업로드하면, 다음과 같이 정상 작동하는 것을 확인할 수 있다.


3. 무선 제어
이제 무선 제어를 위해 블루투스를 연결한다. 여기서는 HC-06을 사용하였다. 다만, 블루투스를 컨트롤러와 연결할 때, RX, TX를 서로 엊갈려 연결해야 정상적으로 동작한다.


연결할 블루투스가 검색되면, 자동으로 baud rate은 9600, 이름은 T'REX, 핀 번호는 1234로 설정된다. 앞서 언급했듯이 HC-06을 사용하면, 미리 속도와 이름을 9600, T'REX 이렇게 설정하도록 한다. 설정 프로그램은 헤라클래스(hercules setup utility by hw-group.com) 프로그램을 사용하였다(여기서 다운로드 가능하다). 블루투스는 앞에 링크에 있는 안드로이드 앱과 연동되어, 로버를 컨트롤한다.

이제 테스트해보면, 다음과 같이 잘 동작됨을 알 수 있다.


이제 센서를 부착하고, 센서 데이터를 처리해 WiFi로 노트북의 ROS master에 전송할 수 있도록 TK1 보드를 설치한다. 사실, 개발 시간이 매우 부족한 관계로 아직 컨트롤보드와 TK1을 통합하지는 못하였다. 센서와 마운트는 로보티즈의 다이나믹셀을 사용하였다. 참고로, 미리 디자인되지 않은 범용 DIY 부품을 쓰다보면, 부품이나 전선 배치가 기성품처럼 깔끔하지 못하다. 그래서, 가능한 연구 목적에 필요한 부품을 수용할 수 있는 프레임을 사용하는 것이 좋다.


다음은 실제로 3차원 이미지 센서를 부착해, 야외에서 테스트해 본 영상이다. 야외는 케이블들이 아스팔트, 콘트리트 바닥에 흩어져 있고, 사람이 진입하기 어려울 설비 박스가 있다.


다음은 실시간으로 로버로 부터 센서 데이터를 취득한 결과 영상이다.


영상에서 보는 바와 같이, 무선으로 제어하고, 센서로 2D, 3D 이미지를 취득할 수 있으므로, 사람이 진입하기 어려운 곳에 활용하기 좋다.


4. 마무리
여기서 사용한 TRex 캐터필러 로버는 야외 동작에 맞게, 모터 토크가 강하고, 프레임이 매우 단단하다. 아울러, 캐터필러가 금속으로 되어 있어, 험한 지형에서도 주행이 안정적이고 원활하다. 그래서, 야외에서 인스펙션이 필요한 센서를 마운팅하고 탐색하기가 좋다.


블루투스 무선 통신 활용 OpenCM 기반 로봇암 제어

이 글은 무선으로 원격 조정할 수 있는 검사 용 마운팅 장비를 간단히 만들어 실험해 보기 위해, OpenCM 9.04 보드 기반 로봇암을 원격제어하는 방법을 정리한 것이다. 원격 제어를 위해, 블루투스를 설정하고, 간단히 로봇암을 제어하는 프로그램을 만들어 본다. 이런 방법을 이용하면, 운영자가 직접 접근하기 어려운 곳을 로봇암 등을 이용해 원격 조사하거나, 장애물 등을 제거할 수 있는 검사 장비, 로버, 드론 등을 만들 수 있다.

참고로, 블루투스 장치는 소형이고 값이 싸며, 다른 무선통신보다 손쉽게 구현할 수 있다. 블루투스 통신 수신 거리는 10~20m 정도 되며, 통신 감도를 떨어트리는 장애물이나 전파 방해가 없으면, 10미터이상도 송수신된다. 보통 10미터 내에서 근거리 통신하기 위해 사용한다.

사용한 부품은 다음과 같다.
  • 로보티즈 OpenCM 9.04
  • BT-410
  • 로보티즈 다이나믹셀
  • 다이나믹셀 Serial USB

이 내용은 다음 레퍼런스를 참고하였다.

1. 개요
OpenCM 9.04는 BT-210, BT-410을 이용한 블루투스 시리얼 통신을 지원한다. 이 글에서는 상대적으로 저렴한 BT-410을 사용하여, 다이나믹셀을 무선 제어해 보는 내용을 정리하였다.


두 블루투스 통신 방식의 차이점은 다음 표와 같으며, BT-410의 데이터 통신 속도가 128 kbps로 좀 낮은 것 제외하고는 큰 차이점은 없다.

ZIG-110/100ABT-100/110A/210BT-410
ConnectivityAndriod
X
O
O
ConnectivityiOS
X
X
O
ConnectivityPC
X
O
X
Connectivity1 Master : 1 Slave
O
O
O
Connectivity1 Master : N Slave
O
X
X
Connectivity1 Phone : 1 Slave
X
O
O
Connectivity1 Phone : N Slave
X
X
support later
DataData Transfer reliability
Low
high
high
DataMax throughput
250kbps
250kbps
128kbps
UpdateModule FW update
X
X
O
MAC addressDefault MAC address
xxxx
BT-110/100 : 001901 xxxxxx
BT-210 : B863BC xxxxxx
DBE7DF xxxxxx
MAC addressMAC address range
0~65535
6 byte
6 byte
  
참고로, BT-210보다 가격이 훨씬 저렴한 HC-05, HC-06을 이용한 통신을 처리하기 위해, 4핀 포트 케이블을 만들어 OpenCM과 연결해 보았다. 그리고, Serial2로 통신을 시도해 보았다. 하지만, 이 방식은 로보티스에서 제공하는 Serial2과 호환이 되지 않는다. 해당 무선 포트를 HC 칩과 연결해 보았으나, Serial2에서 데이터를 송수신하지 못한다. 다른 방식으로 이 문제를 해결해 보기 위해, SoftwareSerial을 이용한 방식을 시도해 보았으나, SoftwareSerial 라이브러리는 OpenCM과 호환되지 않아, 실행 이미지가 빌드되지 않았다. 

2. 블루투스 코드 다운로드 및 연결 테스트
OpenCM9.04와 BT-410을 다음과 같이 연결한다.


ROBOTIS의 OpenCM IDE 소프트웨어를 실행한다 (아두이노 IDE와 유사한 개발 도구이다).
테스트를 위해, OpenCM IDE 메뉴에서 블루투스 소스 코드 예제를 다음 그림과 같이 선택한다. 그리고, 해당 코드를 OpenCM 보드로 다운로드 한다.


이제, OpenCM에 시리얼 통신으로 블루투스 장치와 통신할 수 있는 코드를 업로드하였으므로, 몇가지 테스트를 해 보자. 우선, OpenCM IDE 프로그램을 종료하여, 점유하고 있는 COM포트를 해제한다.

블루투스 설정 및 테스트를 위해, 다음 링크의 Tera Term 프로그램을 다운로드 후 설치한다. 그리고, 실행한다.

실행한 후, 다음과 같이 'serial'모드와 OpenCM에 연결된 포트를 설정하고 확인을 누른다.

다음과 같이, setup->terminal 메뉴를 선택해, 'local echo'모드를 체크한다.

확인을 누른후, 터미널 창에서 '!'를 누르면, ok메시지를 받을 것이다. 'at'명령도 입력해 본다.

3. 안드로이드 앱 기반 블루투스 연결 및 제어 테스트
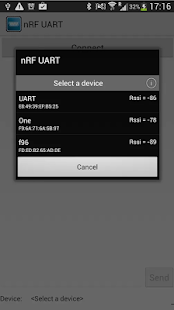
이제 안드로이드 용 블루투스 통신 터미널 앱인 nRF UART v2.0을 다운로드하여 설치한다.


다음과 같이 블루투스 통신을 테스트해보자.

1. OpenCM IDE를 띄우고, 다음과 같이 코딩한 후, OpenCM으로 전송한다.

// BT410 bluetooth string test code
// for testing BT410 bluetooth
// by Kang Tae Wook (laputa99999@gmail.com)
// at 2016.6.22
#include <string.h>
#include <stdio.h>

void setup()
{
  Serial2.begin(57600);  
  Serial2.print("BT410 connect!");
  pinMode(BOARD_LED_PIN, OUTPUT);
  toggleLED();
}

void loop()
{
  char string[256];
  
  int i = 0;
  while(SerialUSB.available())
  {
    char ch = SerialUSB.read();  //send data coming from USB to Serial2
    string[i] = ch;
    i++;
    if(ch == -1)
      break;
    delay(5);
  }
  string[i] = 0;
  
  if(strlen(string))
    Serial2.print(string);  //send data coming from USB to Serial2

  i = 0;
  while(Serial2.available())
  {
    char ch = Serial2.read();
    string[i] = ch;
    i++;
    if(ch == -1)
      break;
    delay(5);
  }
  string[i] = 0;
  
  if(strlen(string))
    SerialUSB.print(string); //send data coming from Serial2 to USB(PC)

  if(strstr(string, "go"))
  {
    toggleLED(); delay(1000);
    toggleLED(); delay(1000); toggleLED();
  }
  else if(strstr(string, "back"))
  {
    toggleLED(); delay(500);
    toggleLED(); delay(500); toggleLED();
  }
  else if(strstr(string, "left"))
  {
    toggleLED(); delay(500);
    toggleLED(); delay(1000); toggleLED();
  }
  else if(strstr(string, "right"))
  {
    toggleLED(); delay(1000);
    toggleLED(); delay(500); toggleLED();
  }  
}

2. 안드로이드 기기와 BT-410 블루투스를 연결한다. 
3. 앱에서 해당 블루투스를 선택해 연결해 페어링한다. 페어링하면, 블루투스 장치의 깜빡거리던 청색 LED가 점멸을 멈추고 켜진 상태가 된다. 


4. 바로 앞에서 설명한 OpenCM 블루투스 예제 코드가 업로드되어 있다면, OpenCM IDE에서 시리얼 모니터링을 실행하고, nRF UART 앱에서 문자열을 입력한다. 그럼, 다음과 같이 정상적으로 무선 통신이 되는 것을 확인할 수 있다.


아울러, 'go', 'back', 'left', 'right' 키워드를 입력할 때마다, OpenCM의 13번 LED가 점멸하는 것을 확인 할 수 있다.

4. 로봇 암 무선 제어 테스트
로봇 암(robot arm)을 무선 제어하기 위해, 로봇 암을 준비한 후, 다음과 같이 OpenCM IDE에서 코딩을 한다. 로봇 암 제작 방법은 이 글 맨 앞의 레퍼런스를 참고한다. 

// BT410 bluetooth string test code
// for testing BT410 bluetooth
// by Kang Tae Wook (laputa99999@gmail.com)
// at 2016.6.22
#include <string.h>
#include <stdio.h>


/* Serial device defines for dxl bus */
#define DXL_BUS_SERIAL1 1  //Dynamixel on Serial1(USART1)  <-OpenCM9.04
#define DXL_BUS_SERIAL2 2  //Dynamixel on Serial2(USART2)  <-LN101,BT210
#define DXL_BUS_SERIAL3 3  //Dynamixel on Serial3(USART3)  <-OpenCM 485EXP

/* Dynamixel ID defines */
#define ID_NUM 1
#define ID_NUM2 2

Dynamixel Dxl(DXL_BUS_SERIAL1);

void setup()
{
  Serial2.begin(57600);  
  Serial2.print("BT410 connect!");
  pinMode(BOARD_LED_PIN, OUTPUT);
  toggleLED();
  
  Dxl.begin(3);
  Dxl.jointMode(ID_NUM); //jointMode() is to use position mode    
}

void loop()
{
  char string[256];
  
  int i = 0;
  while(SerialUSB.available())
  {
    char ch = SerialUSB.read();  //send data coming from USB to Serial2
    string[i] = ch;
    i++;
    if(ch == -1)
      break;
    delay(5);
  }
  string[i] = 0;
  
  if(strlen(string))
    Serial2.print(string);  //send data coming from USB to Serial2

  i = 0;
  while(Serial2.available())
  {
    char ch = Serial2.read();
    string[i] = ch;
    i++;
    if(ch == -1)
      break;
    delay(5);
  }
  string[i] = 0;
  
  if(strlen(string))
    SerialUSB.print(string); //send data coming from Serial2 to USB(PC)

  char* value = strstr(string, "=");
  int angle = 50;
  if(value)
  {
    value = value + 1;
    angle = atoi(value);
    if(angle < 0)
      angle = 0;
    if(angle >= 512)
      angle = 512; 
    SerialUSB.print("angle=");
    SerialUSB.print(angle);
  }

  if(strstr(string, "yaw="))
    Dxl.setPosition(ID_NUM, angle, 70);    // ID, position between 0 to 1023, speed between 0 to 100 
  else if(strstr(string, "roll="))
    Dxl.setPosition(ID_NUM2, angle, 70);
  else if(strstr(string, "left"))
    Dxl.setPosition(ID_NUM, 0, 70);    // ID, position between 0 to 1023, speed between 0 to 100 
  else if(strstr(string, "right"))
    Dxl.setPosition(ID_NUM, 512, 70);    // ID, position between 0 to 1023, speed between 0 to 100 
  delay(1000);// it has more delay time for slow movement
}

OpenCM에 위 코드를 업로드하고, 무선으로 안드로이드 앱을 통해 테스트를 해 본다. 다음과 같이 작동되면 성공이다.

로봇 암 무선 제어 결과

5. 마무리
이제 무선으로 로봇 암과 같은 엑추에이터를 제어할 수 있다. 로버나 드론에 무선 제어를 할 수 있는 로봇 암을 마운팅하고, 로봇 암에 여러가지 인스펙션 센서나 그립을 부착하면, 다양한 응용 로봇을 만들 수 있다.

오픈소스 기반 로버 개발 사례

드론에 2 DoF 로봇암 마운팅 사례

2016년 6월 1일 수요일

스마트 세이프 - smart safe 만들기

이 포스트는 스마트 세이프 금고 만들기에 대한 글입니다.

실제 아래와 같은 금고는 아니고요^^ 아두이노로 작은 금고를 만들고, 스파이가 되어 금고 안에 물건을 몰래 가져오는 게임을 만들겁니다.


일종의 장난감이지만, 실용성도 있어요. 아이와 함께 똑똑한 금고로 만들어, 스파이가 우리의 보물을 훔쳐가지 못하게 센서도 부착해, 감시할 겁니다.


그럼 기대해 주세요.